This post is an update to my earlier guide on installing Claude Desktop on Ubuntu/Debian. If you’re new here, start with that post first — this one covers what’s changed and how to update your existing install.
The Package is Back — and Better Than Ever
When we originally wrote the installation guide, the community-maintained claude-desktop-debian package by aaddrick was showing signs of going dormant. We’re happy to report that it has been fully resurrected and is more active than ever — sitting at 3,000+ GitHub stars, 75+ releases, and a thriving contributor community.
Even more importantly, the project now supports an APT repository, meaning Claude Desktop can update automatically alongside your other system packages. No more manually hunting for new .deb files.
There’s also a notable new feature: Cowork mode is now supported on Linux (experimental). You can run claude-desktop --doctor at any time to check your setup and see which isolation backend is active.
Step 1: Figure Out Which Method You Used
If you installed Claude Desktop a while back and don’t remember how you did it, run this:
apt-cache policy claude-desktop
Look at the output:
If you see a URL like https://aaddrick.github.io/claude-desktop-debian or https://pkg.claude-desktop-debian.dev — you already have the APT repo set up. Skip to Step 2.
If you see only100 /var/lib/dpkg/status — you used the manual .deb method. Continue with Step 2 to add the repo.
If the command returns nothing — Claude Desktop isn’t registered with apt at all. Head back to the original guide for a fresh install.
Step 2: Migrate to the New APT Repository
Whether you’re coming from the manual .deb method or from the old APT repo URL, run the following to set up the current repository:
# Add the GPG key
curl -fsSL https://pkg.claude-desktop-debian.dev/KEY.gpg | sudo gpg --dearmor -o /usr/share/keyrings/claude-desktop.gpg

# Add the repository
echo "deb [signed-by=/usr/share/keyrings/claude-desktop.gpg arch=amd64,arm64] https://pkg.claude-desktop-debian.dev stable main" | sudo tee /etc/apt/sources.list.d/claude-desktop.list

# Update and install
sudo apt update
sudo apt install claude-desktop
If you already have Claude Desktop installed, the last command will upgrade it in place. Your MCP configuration at ~/.config/Claude/claude_desktop_config.json will be preserved.
From now on, Claude Desktop will update automatically whenever you run sudo apt update && sudo apt upgrade.
Troubleshooting
“The repository does not have a Release file”
If you had previously set up the old APT repo (hosted at aaddrick.github.io), you may see this error when running apt update. The repo moved to a new domain in April 2026. Clean up the old entry and add the new one:
If you want a one-liner instead (i.e., if you set up the old repo yourself and know what you’re doing), you can use sed to update the URL directly inside the existing file:
sudo sed -i 's|aaddrick.github.io/claude-desktop-debian|pkg.claude-desktop-debian.dev|g' /etc/apt/sources.list.d/claude-desktop.list
Quick explainer on that command: sed -i means “edit this file in place.” The s|old|new|g part means “substitute every occurrence of the old URL with the new one.” It’s a find-and-replace for the terminal.
Unrelated GPG errors from other packages
When running apt update, you may see GPG signature errors from completely unrelated packages — for my example, Spotify cropped up. These are separate issues that have nothing to do with Claude Desktop. A typical fix for Spotify looks like:
For other packages, search for the package name + “GPG key ubuntu” to find the current key URL. The pattern is the same: download the key, convert it with gpg --dearmor, and drop it in /etc/apt/trusted.gpg.d/.
That’s it! If you run into anything not covered here, the GitHub Issues page for the project is active and well-monitored. And as always, claude-desktop --doctor is your first stop for diagnosing anything that seems off.
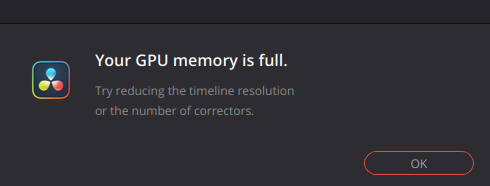
Why does this fix – recommended by a user in Blackmagic’s own forum – work? Because Resolve on Linux sometimes fails to find the right GPU without a firm nudge.So this command is like a strongly worded suggestion.
Also note: my GPU processing mode in Preferences was wrongly set to OpenCL instead of CUDA.
Act 2: Video Files That Refused to Have Video
With the GPU error gone, it was time to import some footage. MP4 and MKV files imported fine — except they had no video. Just audio, playing over a grey rectangle. Very avant-garde, but not ideal for editing, as others have noted.
Claude had a simple explanation for me: DaVinci Resolve free on Linux cannot decode H.264 or H.265. Hardware decode is a Resolve Studio (paid) exclusive. The Decode Options preferences screen on version 20 confirms this by simply not having the relevant checkbox at all.
The solution: pay up. Or… transcode your footage to DNxHR, a codec Resolve handles natively, using FFmpeg:
Don’t ask me what all those commands mean! It just works. The video has video now.
Act 3: The App Froze, Took the Second Monitor Hostage, and Wouldn’t Give It Back
While poking around preferences, Resolve froze completely. The second monitor became an artifact — a zombie window with a frozen cursor, completely unresponsive, while the real cursor moved freely on the primary display.
pkill -9 resolve killed the process, but the ghost window remained. Painted on the screen like a bad memory. Eventually the nuclear option worked: unplugging and replugging the HDMI cable. Sometimes the most elegant solution is the simplest one.
Act 4: Making It All Less Annoying to Start
Typing a 70-character environment variable command every time you want to edit video is not a sustainable lifestyle. So we automated two things:
A launcher script — a simple shell script that wraps the long command, installable as just resolve on your PATH.
A conversion tool — resolve-convert, a script that takes any video file and spits out a Resolve-compatible .mov next to it. Drag a file in, press Enter, done.
Another LLM – let’s call it “Gem” – peer-reviewed the conversion script and raised eight issues with it, some valid (ffmpeg consuming stdin, DNxHR being picky about non-standard resolutions), some less so.
Act 5: The Dock Icon Fix That Took Out VS Code
The final boss: making the dock icon launch Resolve correctly without needing a terminal. The fix is to override the .desktop file in ~/.local/share/applications with the correct Exec= line including the GPU environment variables.
Did that. Then, in a moment of misplaced confidence, ran killall -HUP gnome-shell to refresh the app cache. On X11, this restarts the compositor, which closes windows on secondary displays. VS Code, which was on the secondary display, did not survive.
The correct command — update-desktop-database ~/.local/share/applications — does the same job without the collateral damage. Claude apologized, “Lesson learned. Sorry about your VS Code windows.”
A massive shift in how we work is occurring, but are you trained in operating your new AI mech suit?
Now as those of you on my mailing list who don’t frequent Polish online casinos recently surmised, using AI to write a janky WordPress plugin is not a super-duper awesome idea. It can lead to security issues quickly!
Here’s a mech suit, in case you didn’t know what that meant:
Imagine if the Weyland-Yutani Corporation had forbid mech suits
Not just a mech suit for your work, but for your career.
Some companies are not allowing use of AI tools yet. If possible, leave such companies, or start learning and practicing on the side. As I mentioned in a recent post, when the AI bubble bursts and people realize AI is still around and not going anywhere, those companies and staff will need to scramble to upskill, or be left behind.
If it’s not possible to make a job change, make sure you are getting trained up in the AI skills that are top in your industry vertical.
Hat tip to Nate B. Jones for the metaphor. How have you found it helpful in your day-to-day? Drop me a message and let me know – I read every email!
IMPORTANT NOTE: This script will analyze the email, determine which reply from a set of templates is most appropriate, then customize that reply as needed for that particular customer/inquiry, adding in the customer’s name and adding your desired email signature. Then it will forward that generated reply back to you at the same address, for human review (as in-line text). You still need to then send the generated reply, it will NOT do the sending for you.
So we’ve refined the previous script a bit to add a JSON file full of reply templates. Now there’s a JSON added to the template literal prompt for {templateOptions}, which is then passed to the LLM.
The context size is increasing but the tradeoff is that we are getting increased functionality from our auto-responder (only intended for nuisance, non-sensitive emails or in line with your company security policy):
// Global variable to cache the loaded reply templates to avoid re-reading the file on every function call.
var cachedReplyTemplates = null;

/**
 * Main function to process forwarded emails.
 */
function processForwardedEmails() {
  try {
    console.log("Starting email processing...");

    var allThreads = [];
    var start = 0;
    var maxBatch = 100; // Process 100 threads at a time

    // Search for UNREAD emails that don't have "AUTOMATED REPLY" in the subject
    var searchQuery = 'is:unread -subject:"AUTOMATED REPLY"';

    do {
      var threads = GmailApp.search(searchQuery, start, maxBatch);
      allThreads = allThreads.concat(threads);
      start += threads.length;
      console.log("Found " + threads.length + " unread forwarded threads in batch, total " + allThreads.length);
    } while (threads.length === maxBatch);

    console.log("Total threads to process: " + allThreads.length);

    for (var i = 0; i < allThreads.length; i++) {
      var thread = allThreads[i];
      var messages = thread.getMessages();
      var latestMessage = messages[messages.length - 1];

      console.log("Processing email " + (i + 1) + ": " + thread.getFirstMessageSubject());
      console.log("From: " + latestMessage.getFrom());
      console.log("Is unread: " + thread.isUnread());

      // Extract original subject from the forwarded email content
      var originalSubject = extractOriginalSubject(latestMessage.getPlainBody(), thread.getFirstMessageSubject());
      console.log("Original subject: " + originalSubject);

      // Generate reply using Gemini
      console.log("Generating reply...");
      var reply = generateReply(latestMessage.getPlainBody());
      console.log("Reply generated, length: " + reply.length);

      // Send the generated reply back to you for review
      console.log("Sending reply to self...");
      sendReplyToSelf(originalSubject, latestMessage.getPlainBody(), reply);
      console.log("Reply sent!");

      // Mark as read, but DO NOT archive the email
      thread.markRead(); // First, mark as read
      console.log("Email marked as read.");
    }

    console.log("Processing complete!");
  } catch (error) {
    console.log("Error: " + error.toString());
    console.log("Stack trace: " + error.stack);
  }
}

/**
 * Extracts the original subject from a forwarded email's body.
 * @param {string} emailBody The plain text body of the email.
 * @param {string} forwardedSubject The subject of the forwarded email from Gmail.
 * @returns {string} The extracted original subject.
 */
function extractOriginalSubject(emailBody, forwardedSubject) {
  // Try to find "Subject:" in the forwarded email body
  var subjectMatch = emailBody.match(/Subject:\s*(.+)/i);

  if (subjectMatch && subjectMatch[1]) {
    return subjectMatch[1].trim();
  }

  // Fallback: remove "Fw:" or "Fwd:" from the Gmail subject
  var cleanedSubject = forwardedSubject.replace(/^(Fw:|Fwd:)\s*/i, '').trim();
  return cleanedSubject;
}

/**
 * Loads reply templates from the 'replies.json.html' file.
 * Caches the templates after the first load for efficiency.
 * @returns {object} An object containing the reply templates.
 */
function loadReplyTemplates() {
  if (cachedReplyTemplates === null) {
    try {
      var jsonString = HtmlService.createTemplateFromFile('replies.json').evaluate().getContent();
      cachedReplyTemplates = JSON.parse(jsonString);
      console.log("Reply templates loaded from replies.json.html");
    } catch (e) {
      console.error("Error loading or parsing replies.json.html: " + e.message);
      throw new Error("Failed to load reply templates. Please ensure 'replies.json.html' exists and contains valid JSON.");
    }
  }
  return cachedReplyTemplates;
}

/**
 * Generates a reply using the Gemini API, selecting from a set of pre-defined templates.
 * @param {string} emailBody The plain text body of the email to respond to.
 * @returns {string} The customized reply generated by Gemini.
 */
function generateReply(emailBody) {
  try {
    // IMPORTANT: Ensure you have your GEMINI_API_KEY set in Script Properties (File > Project properties > Script properties)
    var apiKey = PropertiesService.getScriptProperties().getProperty('GEMINI_API_KEY');

    // Ensure API Key is available
    if (!apiKey) {
      throw new Error("GEMINI_API_KEY is not set in Script Properties.");
    }

    // Load all available reply templates
    var templates = loadReplyTemplates();

    // Convert templates object to a string for the prompt
    // This provides Gemini with the full list of options and their content
    var templateOptions = JSON.stringify(templates, null, 2); // Pretty print for readability for AI

    var prompt = `You are an email assistant for TechCorp Solutions. Your task is to select the most appropriate pre-written reply template based on the content of the email and then customize it.

Here are the available reply templates, identified by their keys:
${templateOptions}

Instructions:
1.  **Analyze the "EMAIL TO RESPOND TO" carefully.**
2.  **Determine which of the provided templates is the best fit for the email's intent.**
3.  **Extract the sender's first name, product/service name (if mentioned, otherwise "not specified"), and company name (if mentioned, otherwise "not specified") from the email.**
4.  **Populate the chosen template's placeholders ({customerName}, {productName}, {companyName}, etc.) with the extracted information.** If a placeholder's information is "not specified", omit that part of the sentence or use a polite general phrase where applicable.
5.  **If no template is a good fit, respond with "noMatch".** In this case, provide a polite generic response that asks for more information.
6.  If the email is clearly not about the specific topic of the chosen template, politely redirect them to use the standard template but mention their specific topic.

EMAIL TO RESPOND TO:
${emailBody}

YOUR RESPONSE FORMAT:
Chosen Template Key: [Key of chosen template, or 'noMatch']
Customized Reply: [The full customized reply based on the chosen template and extracted info, or the generic response if 'noMatch']

Example of expected output if a template is chosen:
Chosen Template Key: pricingRequest
Customized Reply: Hello John, Thank you for your interest in our cloud hosting services. Our pricing starts at $99/month for the basic plan and $299/month for premium features. I'll send you a detailed quote within the next business day. You can also view our pricing at www.techcorp.com/pricing. Best regards, Sales Team

Example of expected output if customer name is not specified:
Chosen Template Key: generalInquiry
Customized Reply: Hi there, Thank you for reaching out to TechCorp Solutions. We have received your inquiry and will respond within 24 hours. For urgent matters, please call our support line at 555-0123. Best regards, Customer Service Team

Example of expected output if 'noMatch' is chosen:
Chosen Template Key: noMatch
Customized Reply: Dear Sender, thank you for your email. To assist you further, please provide more details about your inquiry.

---
Chosen Template Key:`; // Start the prompt to guide Gemini's output format

    var payload = {
      'contents': [{
        'parts': [{
          'text': prompt
        }]
      }]
    };

    var options = {
      'method': 'POST',
      'headers': {
        'Content-Type': 'application/json',
      },
      'payload': JSON.stringify(payload)
    };

    var response = UrlFetchApp.fetch(
      `https://generativelanguage.googleapis.com/v1/models/gemini-1.5-flash:generateContent?key=${apiKey}`,
      options
    );

    var data = JSON.parse(response.getContentText());

    if (data.candidates && data.candidates[0] && data.candidates[0].content) {
      var geminiOutput = data.candidates[0].content.parts[0].text;

      // Parse Gemini's structured output
      var lines = geminiOutput.split('\n');
      var chosenKey = '';
      var customizedReply = '';

      for (var i = 0; i < lines.length; i++) {
        if (lines[i].startsWith('Chosen Template Key:')) {
          chosenKey = lines[i].replace('Chosen Template Key:', '').trim();
        } else if (lines[i].startsWith('Customized Reply:')) {
          customizedReply = lines[i].replace('Customized Reply:', '').trim();
          // Concatenate remaining lines if the reply spans multiple lines
          for (var j = i + 1; j < lines.length; j++) {
            customizedReply += '\n' + lines[j].trim();
          }
          break; // Stop after finding the reply
        }
      }

      if (chosenKey === 'noMatch') {
        console.log("Gemini determined no suitable template. Generic reply generated.");
        return customizedReply; // Return the generic response
      } else if (templates[chosenKey]) {
        console.log("Gemini chose template: " + chosenKey);
        // Gemini is now responsible for populating the variables within the 'Customized Reply'
        return customizedReply;
      } else {
        console.warn("Gemini suggested an unknown template key: " + chosenKey + ". Returning generic error reply.");
        return "Error: Gemini suggested an invalid template or failed to choose. Please check manually.";
      }

    } else {
      // Log more details if the Gemini API response is not as expected
      console.log("Unexpected Gemini API response structure: " + JSON.stringify(data));
      return "Error generating reply - please check manually";
    }

  } catch (error) {
    console.log("Gemini API error: " + error.toString());
    return "Error generating reply: " + error.toString();
  }
}

/**
 * Sends the generated reply back to your specified email address for review.
 * @param {string} originalSubject The subject of the original forwarded email.
 * @param {string} originalBody The plain text body of the original forwarded email.
 * @param {string} generatedReply The reply generated by Gemini.
 */
function sendReplyToSelf(originalSubject, originalBody, generatedReply) {
  var subject = "AUTOMATED REPLY: " + originalSubject;
  var body = "Generated Reply:\n" + generatedReply + "\n\n--- Original Email ---\n" + originalBody;

  // Send to your review email address
  GmailApp.sendEmail("admin@techcorp.com", subject, body);
}
And the JSON file has camelcase keys representing a bunch of customer scenarios, with the potential responses as values.
{
  "generalInquiry": "Hi {customerName}, Thank you for reaching out to TechCorp Solutions. We have received your inquiry and will respond within 24 hours. For urgent matters, please call our support line at 555-0123. Best regards, Customer Service Team",

  "pricingRequest": "Hello {customerName}, Thank you for your interest in our services. Our pricing starts at $99/month for the basic plan and $299/month for premium features. I'll send you a detailed quote within the next business day. You can also view our pricing at www.techcorp.com/pricing. Best regards, Sales Team",

  "supportTicket": "Hi {customerName}, We've received your support request (Ticket #{ticketNumber}) and our technical team is reviewing it. Expected response time is 4-6 hours during business days. You can track your ticket status at www.techcorp.com/support. Thanks, Technical Support",

  "partnershipProposal": "Dear {partnerName}, Thank you for your partnership proposal. We appreciate your interest in collaborating with TechCorp. Our partnerships team will review your submission and respond within 5-7 business days. Regards, Business Development Team",

  "jobApplication": "Hello {applicantName}, Thank you for applying for the {positionTitle} role at TechCorp. We have received your application and will review it with our hiring team. If your qualifications match our needs, we will contact you within two weeks. Best wishes, HR Department",

  "vendorInquiry": "Hi {vendorName}, Thank you for introducing your services to TechCorp. We are currently evaluating our vendor relationships and will reach out if we have a need that matches your offerings. Please keep us updated on your services quarterly. Thanks, Procurement Team",

  "mediaRequest": "Hello {reporterName}, Thank you for your media inquiry. Our PR team will review your request and respond within 48 hours. For urgent press matters, please contact our media hotline at 555-0199. Regards, Public Relations Team",

  "refundRequest": "Dear {customerName}, We have received your refund request for order #{orderNumber}. Our billing department will process this within 3-5 business days and send you a confirmation email. If you have questions, please contact billing@techcorp.com. Customer Care Team",

  "scheduleMeeting": "Hi {contactName}, Thank you for requesting a meeting. Please use our scheduling link to book a convenient time: www.calendly.com/techcorp-meetings. Available slots are Monday through Friday, 9 AM to 5 PM EST. Looking forward to speaking with you, Sales Team",

  "productFeedback": "Hello {customerName}, Thank you for taking the time to share your feedback about {productName}. Your insights help us improve our products. Our product team will review your suggestions for future updates. We appreciate your continued support, Product Team",

  "serviceNotOffered": "Hi {customerName}, Thank you for your inquiry about {requestedService}. Unfortunately, TechCorp does not currently offer this service. We specialize in cloud infrastructure and software development solutions. You might want to try reaching out to companies that focus specifically on {serviceCategory}. We appreciate your interest, Customer Service Team",

  "unsolicitedAdvertising": "Hello, Thank you for reaching out. TechCorp is not interested in {advertisedProduct} at this time. Please remove our email address from your mailing list and do not send us further promotional materials. If you continue to contact us after this request, we will report it as spam. Regards, TechCorp Administration"
}
To try this if you haven’t already from my previous part 1 post, go to https://script.google.com/home and add a new project (you can make a new Gmail account just for forwarding). Then, add a new script. In the Code.gs file, paste this into the editor window. Then add another script and name it ‘replies.json.html’, pasting in the JSON file.
Inside the Code.gs script, go to the sendReplyToSelf() function and replace the dummy email with your own email address where you will review the generated messages.
Your Gemini API key can be entered in https://script.google.com/home/projects under Settings. Run a test by forwarding an email to this new Gmail address, then click the “Run” button at the top of the code editor page. You should see the execution log at the bottom for any errors.
After confirming that it’s working, of course you’ll want to replace the dummy scenarios in the JSON file with your own frequently-encountered scenarios. It’s a lot of work to type out each one, so perhaps ask an AI to edit the JSON using your company FAQ, or your Zendesk help center documentation, etc.
You can also add fallbacks to another API, like OpenAI for example, in case Gemini is too overloaded. Just add an additional key inside your Apps Script settings page:
function generateReply(emailBody) {
  var prompt = buildPrompt(emailBody);

  // 1. Try with Gemini first (primary AI)
  var geminiReply = callGeminiApi(prompt);

  if (geminiReply !== "ERROR_GEMINI_OVERLOADED") {
    // If Gemini didn't fail with a 503, return its response (or any other error)
    return geminiReply;
  }

  // 2. If Gemini is overloaded, try with OpenAI (fallback AI)
  console.warn("Gemini is overloaded. Attempting to use OpenAI as a fallback...");
  var openAiReply = callOpenAiApi(prompt);

  if (openAiReply.startsWith("ERROR_")) {
    console.error("OpenAI fallback also failed. Error: " + openAiReply);
  } else {
    console.log("Successfully generated reply with OpenAI fallback.");
  }

  // Return the OpenAI response, whether it's a success or an error
  return openAiReply;
}
How to Deploy after Testing
You might notice that you need to manually run this app or that the timing trigger will stop working after a certain interval — this is because the app needs to be properly deployed.
From inside the Google Apps Script code editor, you’ll see a “Deploy” button in the upper-right of the screen — click that.
Then Select “API Executable” as the Deployment Type. Restrict access to yourself only.
Have you used this or other email automation? Please do let me know what’s working for you, or if you need help setting this up!
I recently needed certificate handling for some CraftCMS development. Using Chocolatey, I tried installing mkcert and nss (Network Security Services) but got the following error:
nss not installed. The package was not found with the source(s) listed.
Source(s): 'https://chocolatey.org/api/v2/'
(Yes, I have still not fully switched back to 🐧Linux yet! Getting there, but I am still using Teams breakout rooms — not available on Linux — and Outlook for my teaching gig, until that ends in a few months.)
So you want to support Firefox, even though Firefox doesn’t support you, o Windows developer?
Yes, let’s be the ‘bigger man’! LOL
Heavily adapted version of Johann ‘Myrkraverk’ Oskarsson’s handy blog post follows, with just a bit of updating for 2024.
It’s gonna require a LOT of steps, including installing Visual Studio Installer and Python, in case you don’t already have it installed — you’ll need Python to install a package called gyp-next :
I also used 7-zip in the terminal to extract the package (you’ll need to extract the .gz file, then extract the resulting .tar ball once more). Your filename will be different depending on the newer version you may download:
7z x nss-3.101.1-with-nspr-4.35.tar.gz
...
7z x nss-3.101.1-with-nspr-4.35.tar
Now you can go into the Visual Studio Installer graphical application. Click the Launch button:
This will launch a new type of terminal inside that app, like this:
Now you can cd into
cd C:\mozilla-build\msys2
Then enter the command:
msys2_shell
ANOTHER shell will pop open (keep the old window open) — enter your SSH password (nothing will appear at the prompt as usual) then hit Enter. It should say, “Identity added” to your local hosts.
Almost there. Now return to the terminal window which was launched by Visual Studio Installer (the one we kept open). CD into the extracted directory for NSS ( cd nss\nss-3.101.1 or whatever folder you created for it). Make sure you further cd into ‘nss’.
Lastly, run
build.sh
Now if you back out one level, you will see you have a new folder called ‘dist’. I don’t think you actually need this folder when just developing frontend applications, but let’s see! UPDATE: no, I have not needed it and it’s been 2 months. 😉
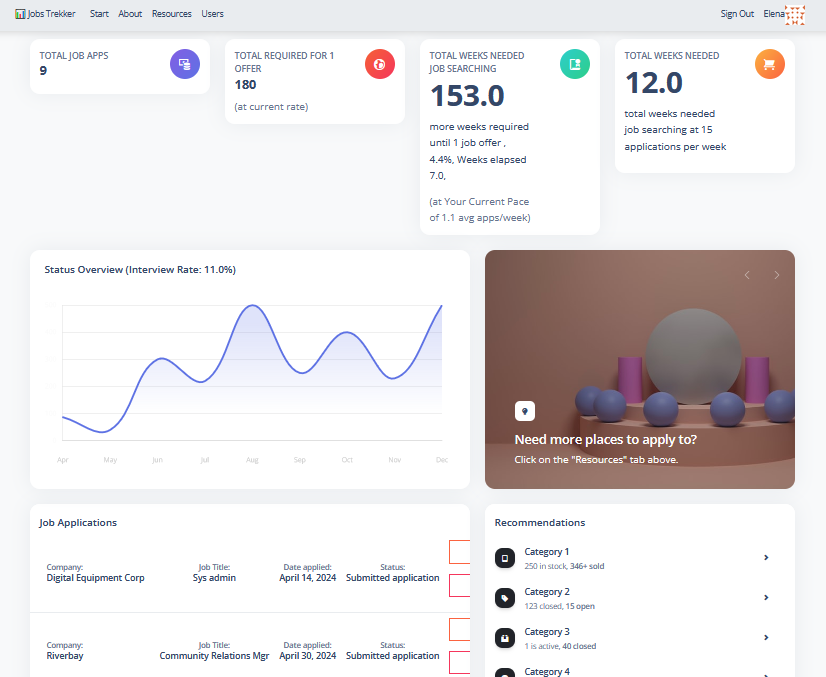
A big issue with my job tracking app for jobseekers was the terrible colors. “Just build an MVP, don’t worry about aesthetics,” was the vibe that led me to the weird green background color.
But that’s gone, now that a slick new ‘skin’ has been applied — the Argon dashboard for Django, an open-source package.
There are still a lot of other issues to be fixed, but that was a very pressing one which I think adds some momentum.
The Argon dashboard is installable via pip, so it’s easy to integrate. I wish I had used it from the beginning, because it kinda took over my routing — it assumes you want to use its login page (it has a password reset link and other bells and whistles which I’m not quite ready for yet). A few adjustments to urls.py and it was fixed.
It also comes with a lot of icons that I don’t need and will have to tweak. Overall it’s quite a robust package. If and when I get more users, I’ll pay for the commercial license, where there is also a bit of support via Discord.
Next is mapping the data points on the line graph correctly!
Oh yes, I am officially a YouTuber (cue fanfare.wav). In case you missed it: here’s a video walkthrough of the JobsTrek app. (Discussion of the code starts here.) I was a bit sleepy when I made this one, so let’s just says it’s not exactly electrifying YouTube. But I did enjoy making it! Someday I’ll invest in a proper video editor and make some cuts to these videos.
simple demo of the JobsTrekker Django app
It’s possible that I’ll relaunch once I’ve added an expanded dashboard. I had also started adding a chatbot using the Crisp.ai app integration, so I may again get to work with the OpenAI API…stay tuned.
Working with the Nucamp grads and prospective students again is also rewarding — they are a good group of folks trying to better their lives for their families, and seeing them help one another in the community is awesome.
Deciding whether to go further with the YouTube channel, I was able to host another couple of career workshop sessions for some job training clients from Goodwill NYNJ this month. It’s great to be able to offer my skills and just share my experience with what not to do!
Because I have some free time this evening (wow!) I thought I’d burrito-ify myself in front of the computer and finally make a photo viewer Android app for myself.
Let me back up a bit — since LG stopped making phones, I was forced to get a Motorola phone recently. It’s nice and all, but it doesn’t come with a photo viewer. Which means one must use all the Google apps (file viewer, Photos app, etc) to access one’s files.
This is no bueno.
So naturally I have simply not been opening my files on my phone. Unless someone has sent it to me via SMS or Discord or what have you, where I can view a preview. Or, if I upload it to my Proton storage, I’ll see a preview. (Even VLC Media Player seems to have failed me here — it doesn’t open 95% of the video files I task it with opening, for some reason.)
I got started with a video appropriately titled, “Getting Started With Ignite,” by Jamon Holmgren of Infinite Red. (https://www.youtube.com/watch?v=KOSvDlFyg20)
Install Yarn first if you want to follow this video smoothly (it can be installed via npm).
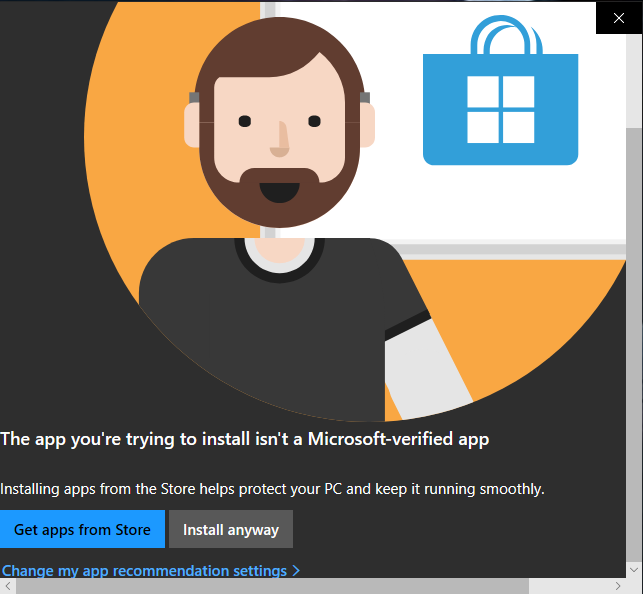
Deciding to upgrade to Node 20.8 to keep pace with the video, I downloaded the msi file from the official Node site, and double-clicked it — I didn’t have any reason not to install it globally on this machine. The usual “Get apps from Store / Install anyway” Microsoft warning appeared, but it had scroll bars; weird. I clicked “Install anyway” several times — nothing happened. Did a dreaded restart. Same thing. So I had to run it from inside PowerShell:
msiexec /i “node-v20.8.0-x64.msi”
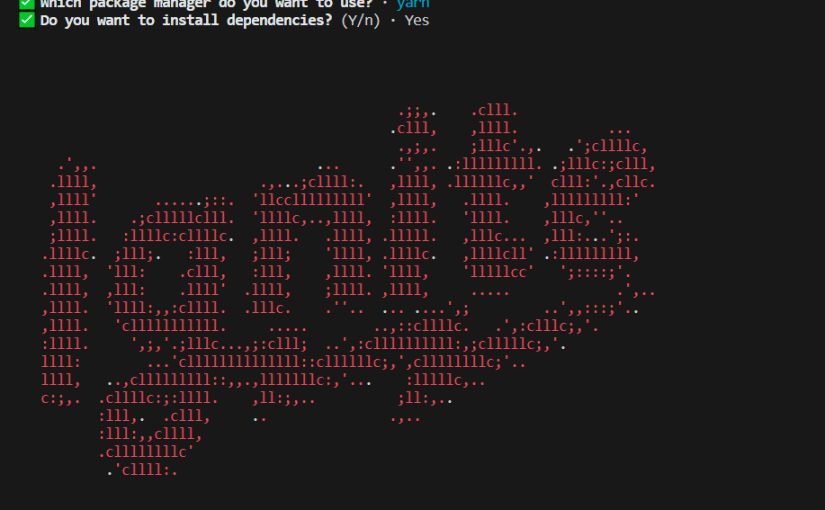
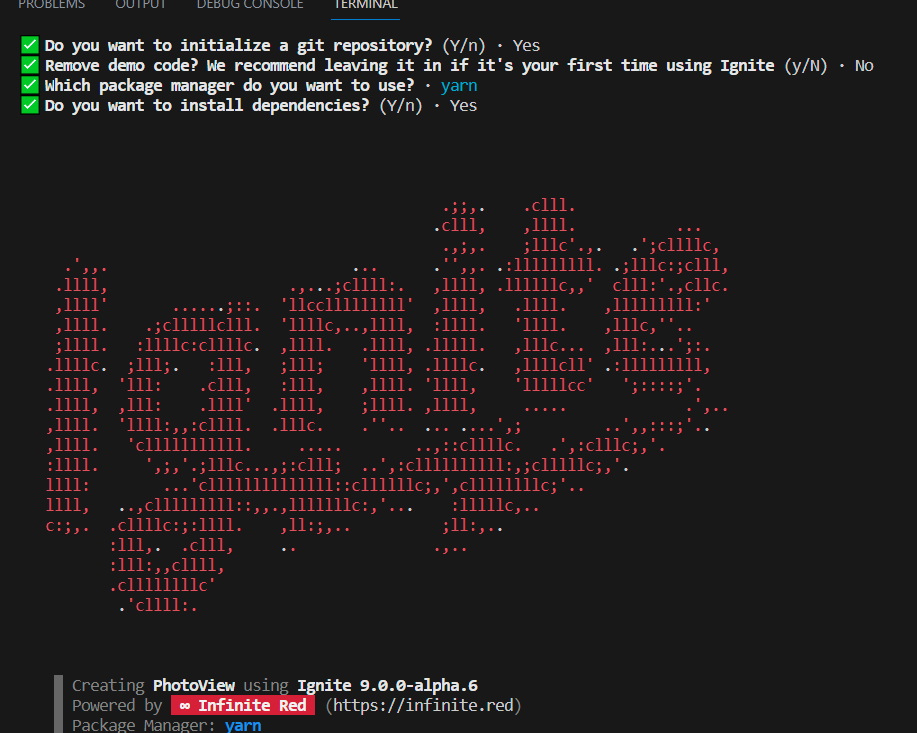
Quite irritating, but I thought it was just a fluke/bug. Next was npx ignite-cli@next new PhotoView
… and selected all the desired settings. I chose all the defaults. I enjoyed the lovely ‘splash screen’:
When I got to ‘yarn android’, the error, ‘Failed to resolve the Android SDK path’ appeared. I remembered that I’d never installed Android studio on this particular computer. Downloading from the official Android homepage, I again ran into the same Windows bug. This time the exe file would not run in PowerShell. My hubby suggested running the Compatibility troubleshooter, which worked, but it seems that the bug can also be bypassed by turning off that warning in the OS settings under Apps & Features > Choose Where to Get Apps.
However, now I’m getting, “Starting Metro Bundler CommandError: No Android connected device found, and no emulators could be started automatically.”
Yay, new error message! But I’m ready for bed now… to be continued. Ok, just kidding…I surfed around Twitter (Xitter?) for a bit, then got my second wind.
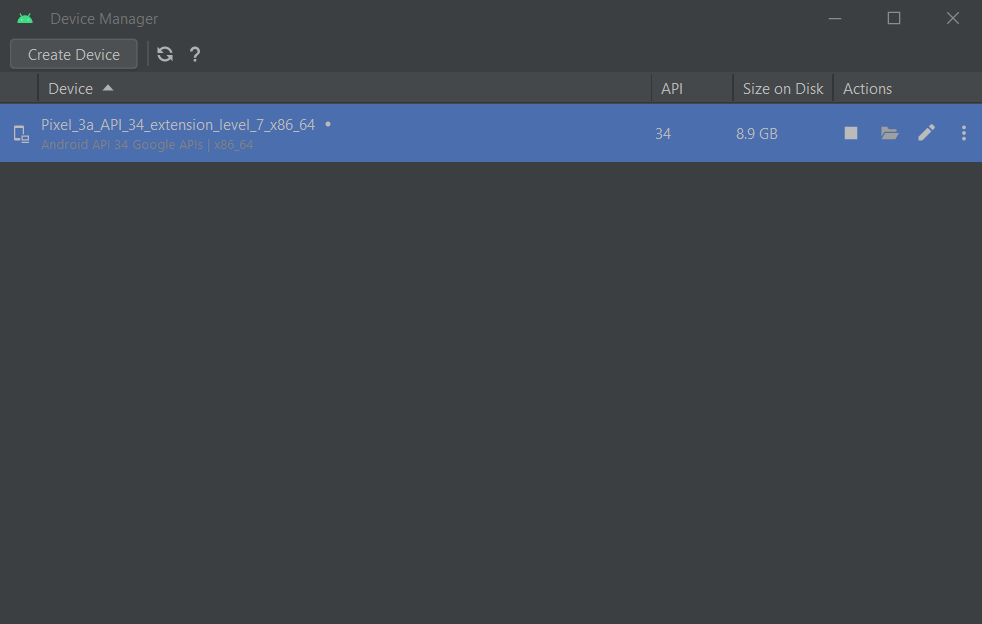
Starting Android Studio, then going into Device Manager and clicking the play button to start the device…
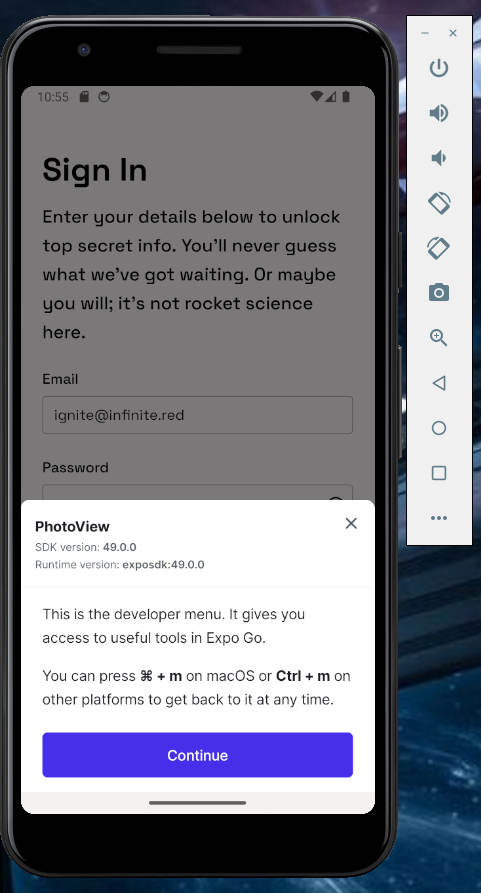
…seems to have worked:
Now to attempt some modifications so I can gradually get a photo viewer… to be continued…
Looking for a cute set of progress bars for my app, I searched around and found a great blog post with a few examples. Originally I had zero intention of using animated progress bars, but they seemed to fit well enough for my needs and actually added a bit of, dare I say, pizazz, to the page.
So I go to play around with the code… aaand it’s jQuery.
facepalm, the other Picard maneuver
On a positive note, usually I can tell what’s going on in jQuery, as if reading psuedocode. It feels sort of like guessing what a Spanish billboard says as an English speaker (to me, anyway). I suppose the faster way to move forward with my project would have been to just import some jQuery via CDN, but I decided that I wanted to fully understand what was going on, and thus decided to rewrite it in plain JavaScript.
“Mayhaps, in the span since first we met, an AI hath vanquished thee, mighty jQuery,” I said to my screen as I Googled “jQuery to JavaScript converter.”
Surprisingly, there was a tool which actually did something, or enough to get me started. Despite some very strange copy on their page, the WorkVersatile converter did deliver on their promise of only “some errors” after conversion.
When the phrase, “how long has that been broken?” enters into your vocabulary, it’s probably past time to add tests to your project.
Finally got my tests going with some momentum. I’ve also adjusted the dashboard view a bit over at JobTrek; although I’m lacking time to design a UI, at least it looks a bit better now. (Leave a comment if you think I shouldn’t wait to find another Bootstrap theme.) And dear Lord help me, I’ve bought a domain name and even coughed up the $7 for the Heroku Hobby plan with SSL.
I’d learned some basics in the Kickstart Coding course, but couldn’t get my basic tests to pass. Turns out I’d been adding my tests to the wrong tests.py file, in the wrong app directory. Hopefully this blog post will save some random person out there from making the same mistake!
Another beginner issue for me was testing templates and content for anonymous versus authenticated users — more on that in my next post.
For some good, free content on testing in Django, check out VeryAcademy’s series on YouTube.