Side project, JobsTrek, YouTube channel

Oh yes, I am officially a YouTuber (cue fanfare.wav). In case you missed it: here’s a video walkthrough of the JobsTrek app. (Discussion of the code starts here.) I was a bit sleepy when I made this one, so let’s just says it’s not exactly electrifying YouTube. But I did enjoy making it! Someday I’ll invest in a proper video editor and make some cuts to these videos.

simple demo of the JobsTrekker Django app

It’s possible that I’ll relaunch once I’ve added an expanded dashboard. I had also started adding a chatbot using the Crisp.ai app integration, so I may again get to work with the OpenAI API…stay tuned.

Working with the Nucamp grads and prospective students again is also rewarding — they are a good group of folks trying to better their lives for their families, and seeing them help one another in the community is awesome.

Deciding whether to go further with the YouTube channel, I was able to host another couple of career workshop sessions for some job training clients from Goodwill NYNJ this month. It’s great to be able to offer my skills and just share my experience with what not to do!

Trying out Ignite with a new Android project

Because I have some free time this evening (wow!) I thought I’d burrito-ify myself in front of the computer and finally make a photo viewer Android app for myself.

Let me back up a bit — since LG stopped making phones, I was forced to get a Motorola phone recently. It’s nice and all, but it doesn’t come with a photo viewer. Which means one must use all the Google apps (file viewer, Photos app, etc) to access one’s files.

This is no bueno.

So naturally I have simply not been opening my files on my phone. Unless someone has sent it to me via SMS or Discord or what have you, where I can view a preview. Or, if I upload it to my Proton storage, I’ll see a preview. (Even VLC Media Player seems to have failed me here — it doesn’t open 95% of the video files I task it with opening, for some reason.)

I got started with a video appropriately titled, “Getting Started With Ignite,” by Jamon Holmgren of Infinite Red. (https://www.youtube.com/watch?v=KOSvDlFyg20)

Install Yarn first if you want to follow this video smoothly (it can be installed via npm).

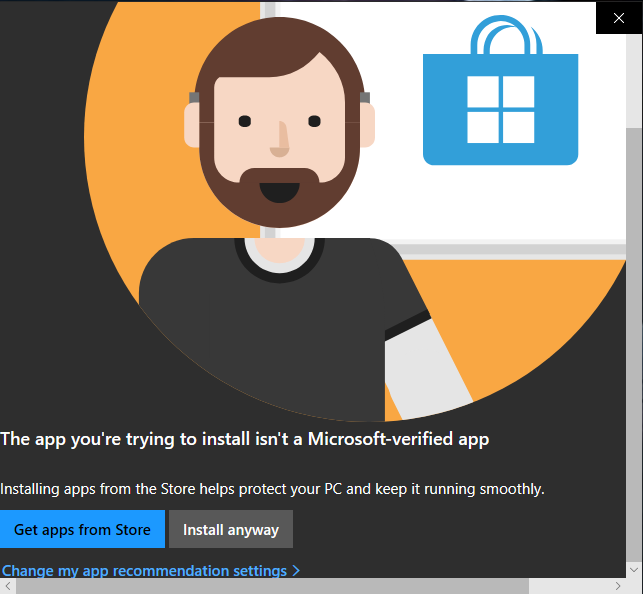
Deciding to upgrade to Node 20.8 to keep pace with the video, I downloaded the msi file from the official Node site, and double-clicked it — I didn’t have any reason not to install it globally on this machine. The usual “Get apps from Store / Install anyway” Microsoft warning appeared, but it had scroll bars; weird.
Windows-install-warning2-Capture
I clicked “Install anyway” several times — nothing happened. Did a dreaded restart. Same thing. So I had to run it from inside PowerShell:

msiexec /i “node-v20.8.0-x64.msi”

Quite irritating, but I thought it was just a fluke/bug.
Next was npx ignite-cli@next new PhotoView

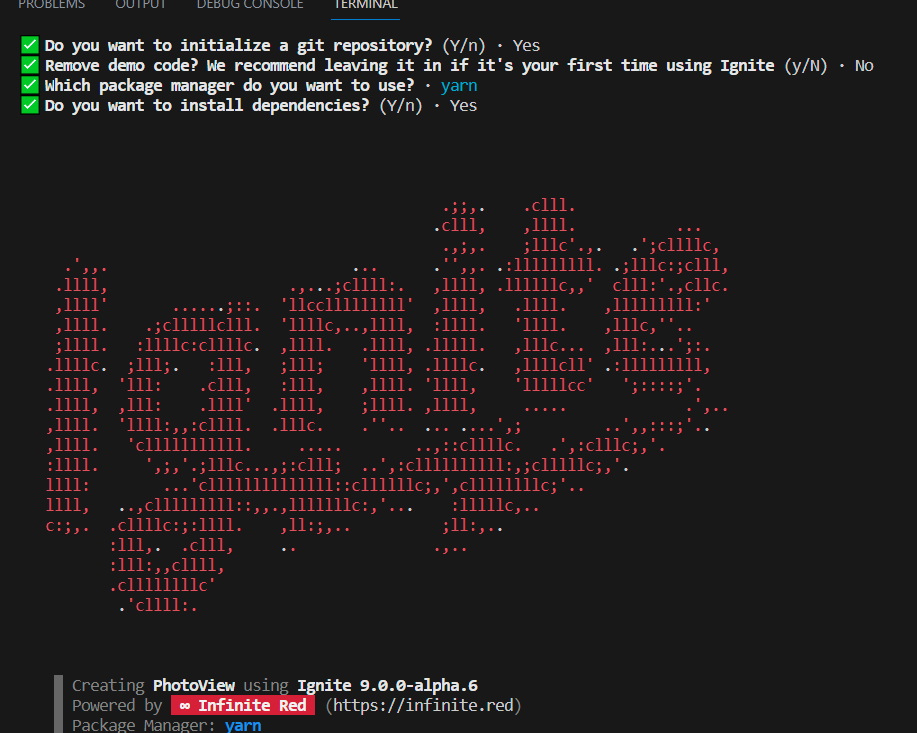
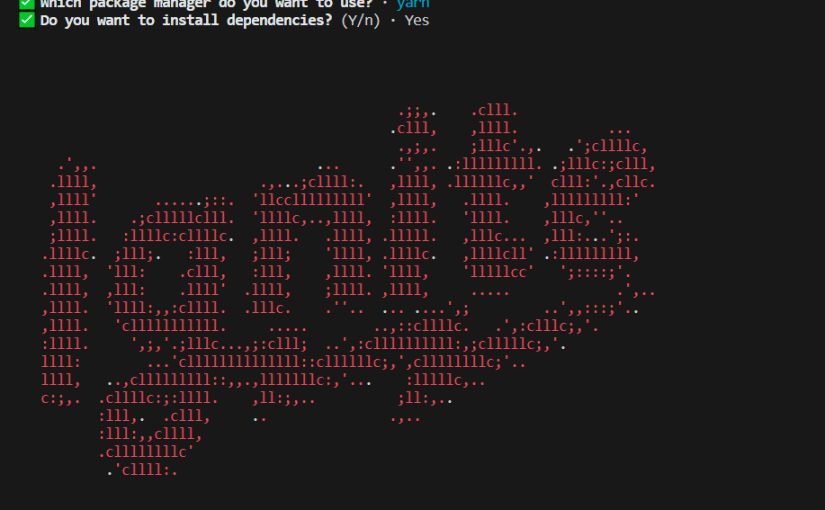
… and selected all the desired settings. I chose all the defaults. I enjoyed the lovely ‘splash screen’:


When I got to ‘yarn android’, the error, ‘Failed to resolve the Android SDK path’ appeared. I remembered that I’d never installed Android studio on this particular computer. Downloading from the official Android homepage, I again ran into the same Windows bug. This time the exe file would not run in PowerShell. My hubby suggested running the Compatibility troubleshooter, which worked, but it seems that the bug can also be bypassed by turning off that warning in the OS settings under Apps & Features > Choose Where to Get Apps.

However, now I’m getting, “Starting Metro Bundler
CommandError: No Android connected device found, and no emulators could be started automatically.”

Yay, new error message!
But I’m ready for bed now… to be continued.
Ok, just kidding…I surfed around Twitter (Xitter?) for a bit, then got my second wind.

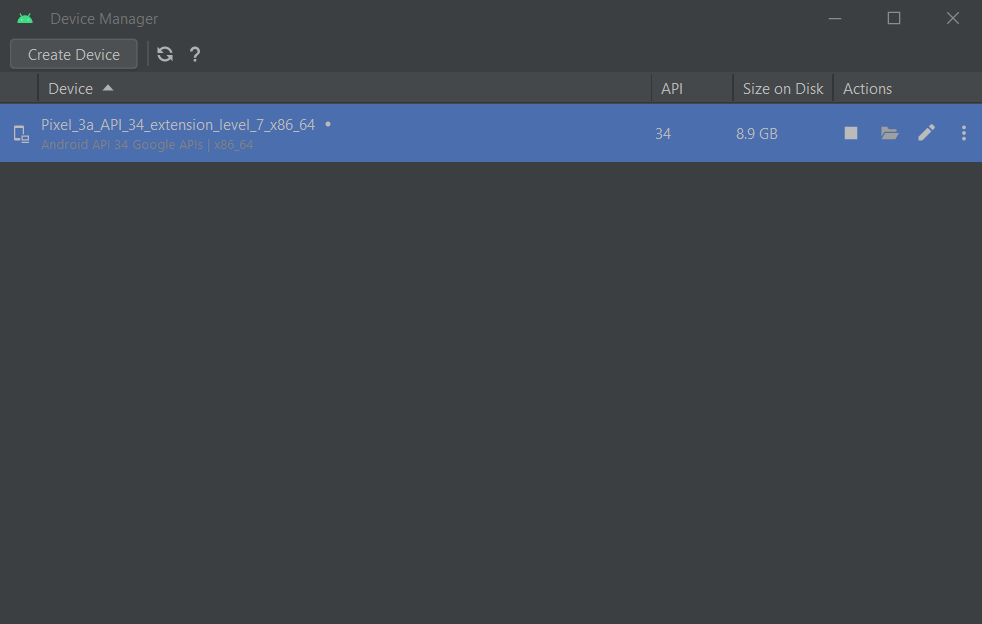
Starting Android Studio, then going into Device Manager and clicking the play button to start the device…

…seems to have worked:

Ignite-boilerplate-emulator

Now to attempt some modifications so I can gradually get a photo viewer… to be continued…

The J.O.B. search continues — is there an app for that?

The fun-employed phase has lost its luster; I’m not quite at the soy-sauce-over-rice-for-dinner stage, but let’s just say it’s crunch time. Now firing off apps left and right, sending LinkedIn DMs, and contacting recruiters and former co-workers is the daily grind.

In side project news, I’ve abandoned SelfWars and all those Vuetify components. Also, I’m finally digging in to SQL joins (studying via Kickstart Coding,) after avoiding it like the plague for so long.

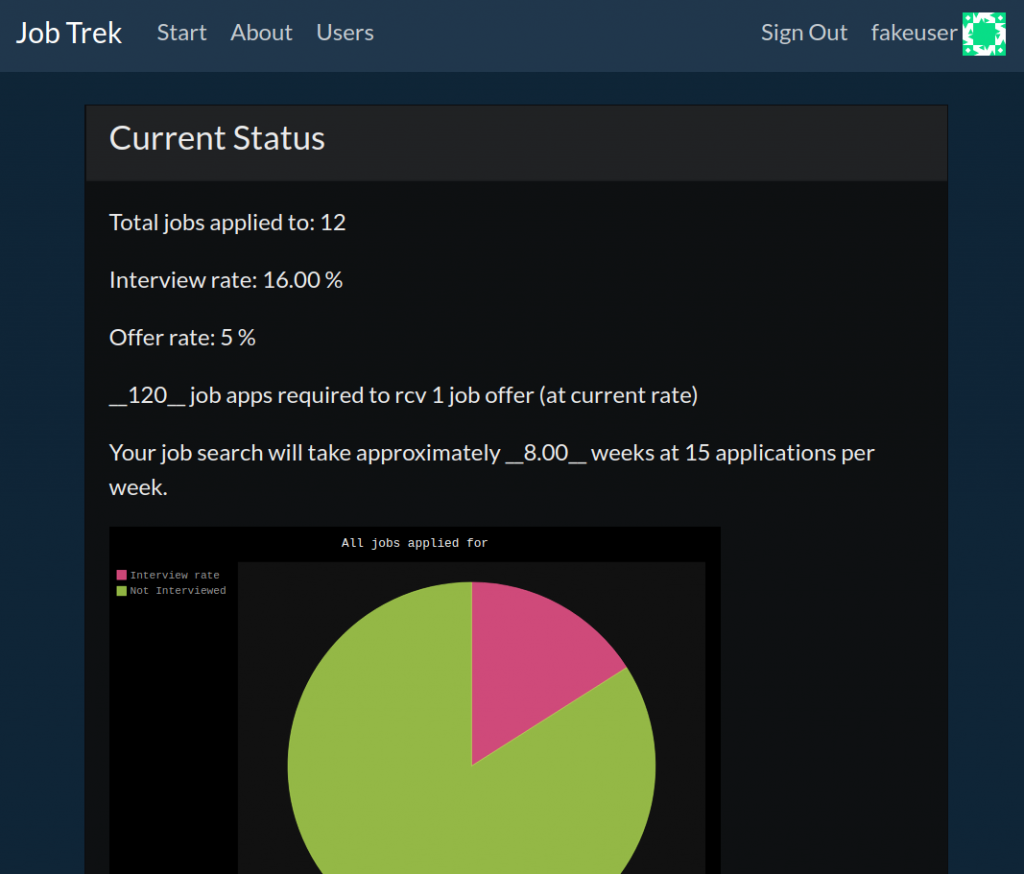
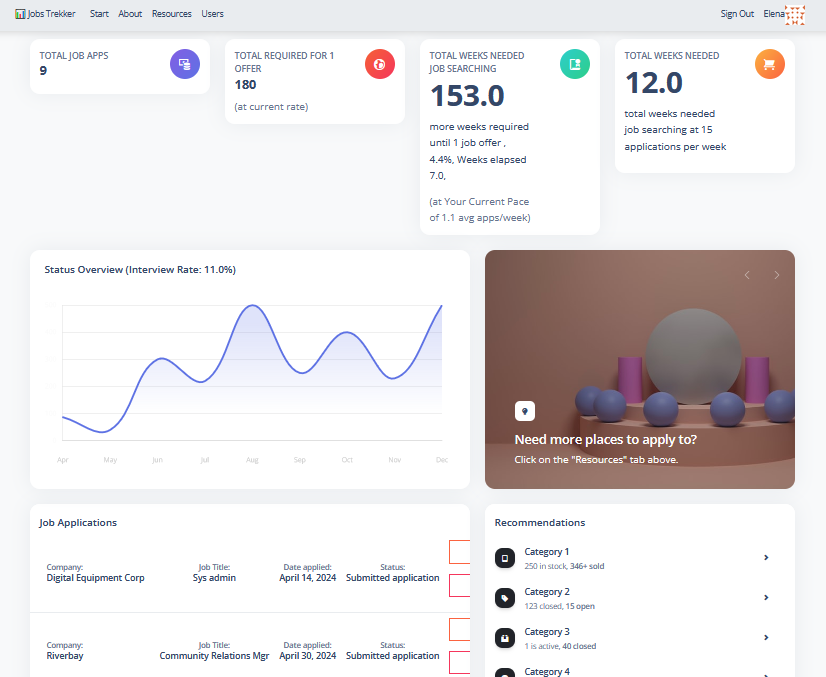
Lately been building a job search progress bar web app in Django. Fun, fun, fun! Wanna take a sneak peek?

“Your search will take approximately 8 weeks”

Step 1: register — I know, I know (a user story for anonymous sessions is on my plate)

Step 2: add some jobs you’ve applied to, using the simple form

Step 3: view your interview rate percentage and offer rate percentages on a handy pie chart (more graphs are planned)

See if your interview rate is around at least 15%, and see approximately how long your search will take. Based on lovely research from TalentWorks.

I know I said ‘progress bar,’ but for now it’s in the form of a pie chart; hey, who dun’ like pie?

I realized I was giving all this ‘daily grind’ advice out to Nucamp students, but when folks see in starkly-presented numbers just how long their job search could take at a certain pace, I think it’s got the potential to be an illuminating kick in the pants.

Downshift: Transitioning and the Career Twisties

My online presence currently projects as a Web Developer, and my current resume still rings more communications- and marketing-heavy. Really though, I am more of a learner, trying to find learning opportunities which will also pay my bills. But transitioning for the career-changer is not for the faint of heart.

Why did I feel the need to make a change? Upon moving with my husband’s job to Hawaii, I found the Hawaii job market to be very tough. There was nothing approaching my previous salary in New York. And it turns out, getting a good job in Hawaii is very, very much based on having friends in the right places. I made a new friend who gave me local cleaning jobs, and I also did a few temp gigs.

Reasoning that companies in other states would have more openings, I began searching remote job boards. I discovered that the higher-paying remote job listings were for developers, and I found out my dad had also been studying Python and other languages when he passed away, so that sealed my decision to study programming. But I had no idea what to study and actually started out with Python.

After a year of stops and starts (not to mention life drama, as it is wont to do, happening,) I realized I should have been focused on web dev! Yet another 6 months later, I realized that I might have benefited most from the regimentation of a bootcamp. I seriously considered attending a bootcamp out of state, but that would mean leaving home and my husband for months, and I learned that even bootcamp grads have to leave Hawaii to find entry-level work.

Just as the talent saturation of the Bay Area was a big factor in protracting  Patrick Thompson’s (YouTube) job search, the Honolulu area suffers from the opposite: many tourism-related jobs, but not many tech companies featuring entry-level opportunities. Transitioning for the career-changer after a certain age also adds an extra layer of difficulty, since there is competition with shiny new grads for the few positions that are available.

Acceptance and Failing Forward

Still doing the cleaning jobs, and I have a couple of job applications in review. If they get rejected I might wrap up my efforts to enter the web dev employment track. I am proud of all that I’ve learned, but basically I wasted 2 whole years trying to get a remote, entry-level web dev job — something that is still pretty rare! But failure can help you find different approaches and is good for your brain! I am viewing this not as a total fail, but as extremely valuable experience.

For example, I attended meetups and enjoyed working with some great people on a fun internship. Meeting a lot of kind folks in the Twittersphere has also been an unexpected bonus. I learned some essential tools, and learned what I didn’t want to work on!

Also, WordPress freelancing was supposed to be a stop-gap measure until I found a permanent job, but I have learned more about WordPress over the past year than in the previous 5 years as a mere user. I might attempt to go the freelance route. This is something I might not have considered a few years ago.

Lastly, I’ve had a lot of fun — many nights I have had to tear myself away from VS Code and go to bed! I even started a side project which might eventually earn some ad and affiliate revenue. A lot of developers will tell you that they don’t code 24/7, but rather have hobbies such as cooking or sports. So it seems natural that I can have coding as a hobby.

Hindsight Which Might Help Other Career-Changers

In hindsight, transitioning as a career-changer was not even something I could have attempted without the support of my husband. Not knowing what I was getting myself into was probably for the best! If I could go back in time and get a do-over, I would try to secure a remote job with a New York company before leaving New York and relocating to Hawaii. New York has such a diversified economy compared to Hawaii, and there are just way more opportunities available. Also, there seems to be an unfortunate perception of Hawaii residents as beach bums who don’t work, not to mention many mainland companies don’t want to complicate their payroll by hiring out-of-state.

Another thing I could have done differently is studying for the jobs where there is demand, not just studying whatever is interesting. I found Python to be a lot more accessible than JavaScript as a newbie, so that’s what I gravitated towards. Nothing wrong with that, if I had also learned Django. I played with Android Studio (Java) because I wanted to try making a mobile app. I took pre-courses for Lambda School (JS) and AppAcademy (Ruby), instead of just working on my own learning projects. Jumping around so much exploring different technologies, it took me much longer to gain enough skill in one language to pass a coding challenge. There is a confusing amount of stuff out there to learn and without a guide — it is tough to know what to focus on. So I’d say just pick a track/stack and start checking the subjects off one by one.

Which brings me to the final hindsight which I hope someone out there may find useful; having someone to guide you. I really didn’t know exactly what I wanted to do; I just thought I might be good at coding since I like solving problems. Looking at a job board, I had no idea what the difference was between a Web Developer, a Front End Engineer, and a Full-Stack Developer. And I was actually interested primarily in software development and machine learning at first. Having a knowledgeable person to talk to about these tracks might have helped me narrow things down sooner and save a lot of time and energy.

I still have a few job applications out there under consideration, so I will update again later…

Chatbots: Overcoming Errors Using the Rasa NLU Starter Pack in Windows

So I got invited to join a team building a chatbot, exciting! When I am able to say more I’ll definately post. I decided to do a bunch of reading and research in my free time. Ironically it was machine learning which originally attracted me to Python and coding a couple of years ago, and I’d given up on that due to employment options in my area.

I looked into a few options and it seems the best choice for keeping your data to yourself and not using external APIs is an open-source package called Rasa. They have a starter pack you can play with. It comes with a nice video guide, but this is running on Linux. I came across a lot of errors during the install process; hopefully this post will help someone else using Windows.

If you already have Python installed (whether by PyCharm or Anaconda or some other bundle,) open a terminal/command line (cmd.exe) and check to see what version you have by typing:

$ python --version

(Only type everything after the $, at the command prompt.)

You might want to also search for any instance of ‘python.exe’ on your PC.

‘python’ is not recognized as an internal or external command / Can’t find python.exe install folder

When you see “‘python’ is not recognized as an internal or external command” in the terminal, but you know for a fact that you have Python installed (perhaps, um, several different versions in several places,) you might think you are an idiot. But you’re not!

WHY IS THIS THE DEFAULT INSTALL PATH FOR PYTHON ON WINDOWS? WHY APPDATA. WHHYHKLJASLJKHJHKLASDHJKDSAKLadj,sfgjklmbn,dasfkl USE PROGRAM FILES pic.twitter.com/CvtrE2hXBF— CrashBash-Kun (@CrashBash000) July 2, 2017

(frustrated user tweet)

After some web searching, I tried setting the Python path in Advanced System Settings>Environment Variables. But that default install directory was too deep (ideally we want it in a top-level folder,) and it is a hidden system folder to boot, so I was really wondering where it installed to.

The easiest way to fix that is to reinstall Python using the graphical installer. Run the installer as administrator. BE SURE to click the little ‘Add to PATH’ checkbox, or all this will be for naught!! This is a lot quicker than manually adjusting the path in environment variables.
Then choose “Custom install location.” Clicking “Install for all users” should automatically change the install path to the C:Program Files folder.

You may also be able to do this without a full reinstall by selecting Modify/Repair under Control Panel>Programs and Features.

‘$ pip install spacy’ command finishes with murmurhash…MS Visual 14.0 C++ required

Rasa can use spaCy, Tensorflow, or other tool packages to parse text. For some reason, Rasa on Windows requires MS Visual Studio Build Tools. I’m sure there’s a fascinating reason behind this, but for now we just have to accept it. Their user forum and Github page has addressed the issue, and you can download and install the needed bits here. (The link provided in the error message — http://landinghub.visualstudio.com/visual-cpp-build-tools — doesn’t work anymore.)

“access denied” error returned in cmd

Retry the command, but this time run cmd.exe as Administrator (Start menu, type ‘cmd’, right-click the icon and select ‘Run as Administrator.’) I forgot to do this more than a few times.

error: could not find version that satisfies requirement Tensorflow

Turned out I had Python 32-bit installed (issue raised on GitHub here). I uninstalled it via the Programs and Features dialog and installed Python 3.6.8, 64-bit version. I also installed Anaconda because after all the errors, I was getting frustrated with the whole install and just threw the kitchen sink at it. Honestly I’m not quite sure which fixed this error! If I figure it out I will update.

How do you run ‘make’ to train the model?

Unless you install third-party tools, you can’t run the ‘make’ command in the Windows 7 command line. Copy the code from inside the Makefile and paste into the command line:

$ python -m rasa_core.train -d domain.yml -s stories.md -o models/dialogue

ModuleNotFoundError: No module named ‘rasa_core’

I got this after running the rasa_core.train command above. So I ran ‘pip install -U rasa_core’ (again, don’t forget to run as administrator like I did!) This led to the next error:

ERROR: rasa-nlu 0.15.0 has requirement future~=0.17.1, but you’ll have future 0.16.0 which is incompatible.

After a short web search, I just ignored this error because I was getting ready to chuck my laptop out the window. But the code still worked in the end. If you care to share any insights on it, please comment!

ModuleNotFoundError: No module named ‘named win32api’

This appeared after I tried to run the model test with ‘python -m rasa_nlu.server –path ./models’. A web search led me to this solution:

$ python -m pip install pypiwin32

It installed and said ‘successful,’ but the terminal was frozen with no prompt. I started another terminal and re-ran the model test command and…

terminal hangs at “Starting factory <twisted.web.server.Site object”, nothing happens

I thought that nothing happened, but really that was the command to start the server on port 5000. It had been hours since I read through the readme file, and I’d forgotten there was any mention of a server. And I’d seen so many obstacles I didn’t know what success looked like! In the Rasa forums there was a similarly confused poster, and an answer which suggested checking port 5000, but without any mention of HOW to check that port. I went back to the video and found the command:

$ curl XPOST localhost:5000/parse -d '{"query":"Hello", "project": "current"}'

It will need to run in a new terminal window. (When you’re finished you can kill the server in the first terminal window with Ctrl+C.) If you have GitBash installed or if you are using Windows 10 you can run curl. Change “Hello” to “yes”, or “I am Suzy”, and see the different results!
Hurricane Lane a no-show, but nice 3-day weekend for coding!

With Hurricane Lane approaching, sitting around eating snacks, I fully intended to work on Python all weekend. So how did I end up coding a wireframe?  After spending a day figuring out how to install Python on my paid hosting server, I began to feel that a Flask web app at this stage in my learning, was like swatting a fly with a tank. I just need a basic, simple project to get going and to start the portfolio ball rolling, so to speak.

So I started searching for how to build a web app. I came across Sketch, then realized it was only for Mac OS. Since I’m not buying a Mac just to run one program, I started searching for alternatives. I found Adobe dx, but it doesn’t run on Win 7 (yes, I am running Win 7, downgraded a new Kabylake
laptop because I cannot STAND Win 10). A bit more searching turned up the lovely Figma web tool.

Wireframing in Figma

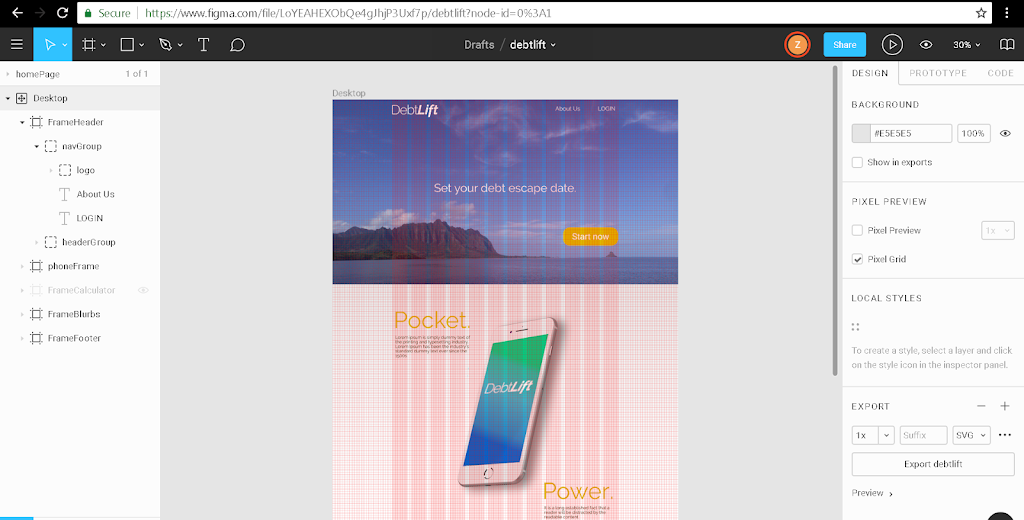
Figma is awesome, very easy to use and very fast. But after making a few wireframes, I had no idea how to code them. A search for “how to code a wireframe” brought me to Jesse Showalter’s series, “Design & Code a Responsive Landing Page from Start to Finish”. I thought it best to start from the first video. He pretty much did everything I had just done in Figma, only he used Sketch.

BUT …video number 6 sure escalated things quick!!
6 – Design & Code a Responsive Landing Page from Start to Finish | Setting Up Your Dev Environment

So the next day, I decided to watch it again, paused it, watched it, paused it MANY times to follow along and decipher what he was talking about.

I already had node and npm installed. Jesse uses GitHub but lately I’m trying out GitLab instead. It seems you can use GitHub Desktop with a GitLAB repository; just go to your GitLab project page and select “Create personal access token”, then copy-paste that https URL into GitHub desktop under the Clone tab.

Installing Gulp and Sass was also super-simple, and Jesse has the framework all set up and ready to use so it’s easy to follow along after deleting the previous project-specific code.

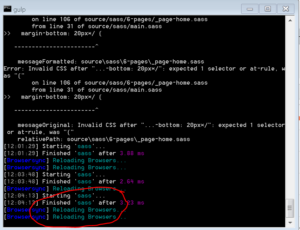
Gulp watches things and refreshes your browser for you!

Anyway, here’s the quick page I ended up building by following Jesse’s tutorial up to video number 8. I’ll probably add some JavaScript later and do a few more different pages. He goes really fast and you have to pause occasionally to see the tiny menus/tabs and figure out what folder he is working in, but I HIGHLY recommend the series — just hit pause and take your time!

先週 レーン 台風 が近づいて , おやつ食べることばっかりして 週末中に Python勉強しよう と 決定しました。 しかし、 うちの 勝ってる ドメイン に Pythonを インストール することを1日間 頑張って, 昇進者によってFlask はちょっとやり過ぎ で , もうちょっと基本的な プロジェクトで スタートしますっと 決めた 。
 それで オンライン で ウェブ アプリ の作り方 を探した 。スケッチとやっぱりあるけど MacOSだけ で使える 。 1つのアプリのためだけ Macを買うつもりない ので 、違うやつを探して 、アドベ DX もあった 。けれども Windows 7 の バージョン は無い (Windows10、は 大嫌いので ダウングレード した 新しい ラップトップ を使ってる )。 そして Figma (フィグマ) と言う すばらしい ウェブ サービス 見つかった 。
 
 ワイヤーフレーム のページ を数枚作って、ワイヤーフレームを どうやってコーディングするの か を 調べて , ジェシー・ショワルターという人 のYouTube 「 ランディングページの デザインと コード、 初めから 最後まで 」
 が出た。 最初モビリオから スタートして , 彼は 私が Figmaでやったことすべて できたけど 違うのは スケッチを使っただだ。
 
しかし。。。 6番目のビリオンは 大変難しくなった !
 
 少し休んで 次の日にもう一回見て, 彼が 何用話しいるか わかるように ポーズして , そしてみて , そして 何回も ポーズした。
 
Node と npm はもインストール されてた 。ジェシーさんは githubを使ってるけど 私は最近GitLabを 使っている。 GitHubデスクトップ トゥーソフト を Gitラボ といっしょに 使えることができる。Gitラボ の ページに行って、 “Create personal access token” を選んで そのhttps の URL を GitHubデスクトップ > クローン というタブ の中に コピペ する 。
Gulp (ガルプ)とSass(サース)をインストールするのはすごい簡単で 、ジェシーさんはその ファイルの準備してくれた ので スムーズで フォローすることができる。
 この ベリオシリーズを 8番目 まで 見ながら このページ ができた。あとで時間があればJavaScript など 入れると思う。 ジェシーの レディオ はちょっと 早けどよくポーズして 時間とって 頑張ってみてください 。

PythonAnywhere and Flask for Beginners

2時間のコースは数日間ぐらいかかったけど 大丈夫です 。仕事の しながら やってたので 、 遅かった。 「初級者 のための Python フラスク」(講師: ジュリアン・セキエイラ) というコースは とても 速で簡単なので 自分に自身が あるようになった。
 virtual environment (バーチュアル エンバイロンメント)を作って、そこにフラスクをインストールする 。 そして .pyファイル, html のファイル, CSS のファイル を作る 。 ちょっとずつ易しく説明されてるけど 、 Python Anywhere (どこでもパイソン ) の案内図みたいのページも 助かった 。


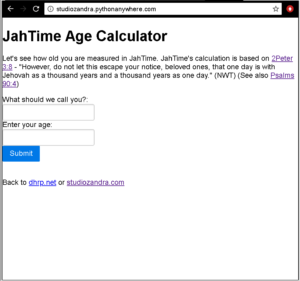
python flask web app called "JahTime", running on pythonanywhere.com


もうちょっと勉強して 、やり直すと思うので この 年齢 カルキデータ はなくなる かもしれない 。このコースはデータベースを 教えていないので 、 パイソン エニウェア のMySQL 案内ページ を使って 勉強を 続く 。。。 
—–

So it took me a few days to get through this 2-hour course, that’s ok! LOL Hey, I do have a day job!
Python Flask for Beginners by Julian Sequeira of PyBit.es is a quick and easy course, which was a good confidence booster for me, to actually be able to finish a course on Udemy for once.

Basically you have to create something called a virtual environment, then install Flask there. Then you create a .py file, an HTML file, and a CSS file. The instructor (@_juliansequeira) goes through this setup step by step, but I found it helpful to also read PythonAnywhere’s walkthrough.

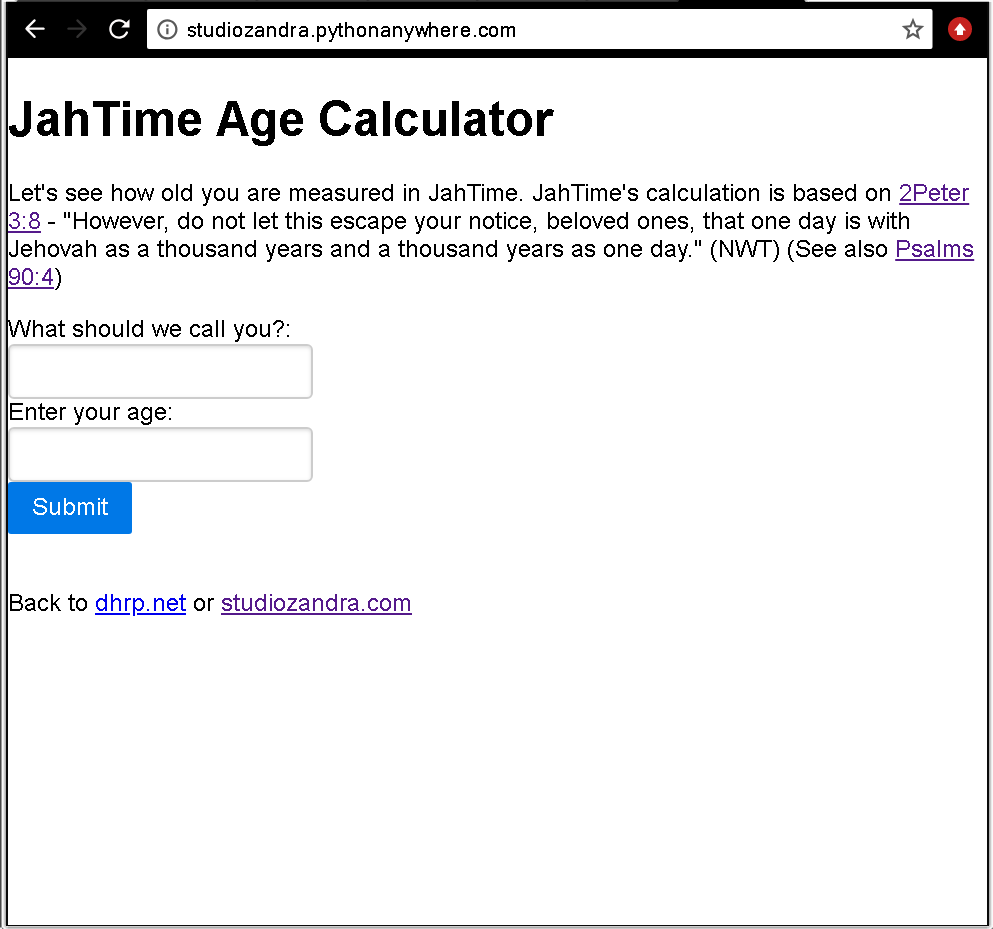
python flask web app called "JahTime", running on pythonanywhere.com

I’ll probably play with more little web forms, so this age calculator will be replaced with whatever I practice next. The course doesn’t get into databases at all, so I think I’ll go through the latter half of the PythonAnywhere walkthrough, which shows how to set up a MySQL database using their service.

Bubble.is — I Made a Thing

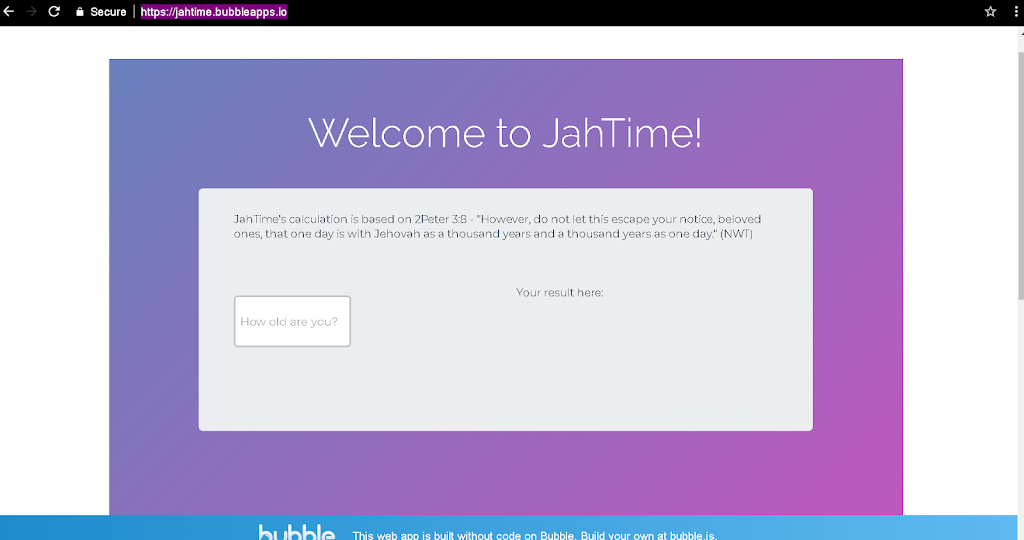
Bubble.is helps people with limited coding skill to produce apps. I had played around with it a few months back but the other day I spent the entire day (I know, I know,) figuring out how to build a little web app which calculates one’s age in what I call JahTime. It’s kind of like how 1 dog-year is about 7 years to a human, instead it’s based on 1 God-day being equal to 1000 human years (according to the Bible).

Desktop browser screengrab of JahTime

So anyway, I have to buckle down and decide which language I will REALLY study thoroughly for the next few months. I was really bouncing around quite a bit between Python, JS, and Java, and therefore not going deeply into any of them! Listening to a podcast at Codenewbie.org, I was reminded that it’s important to pick a language and focus on it for a few months. 

Python, R, and C++ are top choices for machine learning, which I am interested in learning about in the future. I’ve already started on Python. (BUT…a little detour never hurt, right? Famous last words and all that — I’m going to keep playing with Android Studio with London App Brewery via Udemy.)

So here is my Python version of my Bubble JahTime app. But I don’t (yet) know how to make Python interact with HTML in order to build my own web app from scratch…

# This program says hello, asks for user name, age, and returns age in JahTime
while True:
    print(‘Hello.’)
    print(‘What is your name?’)
    myName = input()
    print(‘Nice to meet you, ‘ + myName)
    print(‘How old are you?’)
    myAge = input()
    rounded_myAgeHrs = round(int(myAge) / 0.69)
    rounded_myAgeMin = round(int(rounded_myAgeHrs) % 60)
    myAgeJahHrs = int(rounded_myAgeHrs) / 60
    print(‘You are only ‘ + str(int(myAgeJahHrs)) + ‘ hours and ‘ + str(int(rounded_myAgeMin)) + ” minutes old in Jehovah’s eyes.”)
    cont = input(“Go again? y/n > “)
    while cont.lower() not in (“y”,”n”):
        cont = input(“Go again? y/n > “)
    if cont == “n”:
        break
ーーーーーーーーー
Bubble.is (バブル ・ドット・アイエス) というのは プログラミングあんまり知らなくても 、 アプリを作る助け なってる道具です 。
 数ヶ月前 バブル に登録したん だけど 先週 まる一日 遊んで 「ヤハ タイム」というアプリを作った 。 犬の人生の中 1年間 イコールズ リンゲンの 7年間 と同じ ように(聖書によると) 民にとって1日間 のは 人間 の時間 の 数え方で 1,000年間 となっている 。 自分は ヤハ タイムで何歳 だを 割り出すアプリだ 。
 これから どれの プログラミング言語を しっかり勉強 するのか を 決めなきゃいけないかなってと 思った 。Pythonか JavaScriptか Javaか のあいまいで、どれでも良く学んでいない。「コードニュビー」(コード初心者)と言うポッドキャストのアドバイスは一つ選んで数ヶ月間しかっり勉強しないっと。将来機械学習(きかいがくしゅう)を学ぶ興味あるので、Python、R、C++ はいいと思って、Pythonはもう勉強し始めたのでやっぱりPyだと思う。
今IDLE/SoloLearnでやっているけど、HTML + Pythonを使ってウェブアップの作り方まだわからない。。。

# This program says hello, asks for user name, age, and returns age in JahTime

while True:
    print(‘Hello.’)
    print(‘What is your name?’)
    myName = input()
    print(‘Nice to meet you, ‘ + myName)
    print(‘How old are you?’)
    myAge = input()

    rounded_myAgeHrs = round(int(myAge) / 0.69)
    rounded_myAgeMin = round(int(rounded_myAgeHrs) % 60)
    myAgeJahHrs = int(rounded_myAgeHrs) / 60
    print(‘You are only ‘ + str(int(myAgeJahHrs)) + ‘ hours and ‘ + str(int(rounded_myAgeMin)) + ” minutes old in Jehovah’s eyes.”)
    cont = input(“Go again? y/n > “)
    while cont.lower() not in (“y”,”n”):
        cont = input(“Go again? y/n > “)

    if cont == “n”:
        break

Tech tangent: Python on Linux — here we go!

Not even sure I should call this one a tangent, since I’ve been doing a lot more tech reading than drawing and designing lately. I thought I could turn my art into a side gig, eventually growing into a licensing income stream, but that hasn’t been working out. So maybe my other hobby, techie reading, will play out eventually…

With such an interest in tech in general, I decided to try learning Python again (I learned a few basic operations a few years back but not much beyond “hello world”.) Let’s see how long it will hold my interest this time!

Udemy had a $9.99 sale this week, so I bought the course “Complete Python Boot Camp: Go From Zero to Hero in Python”.

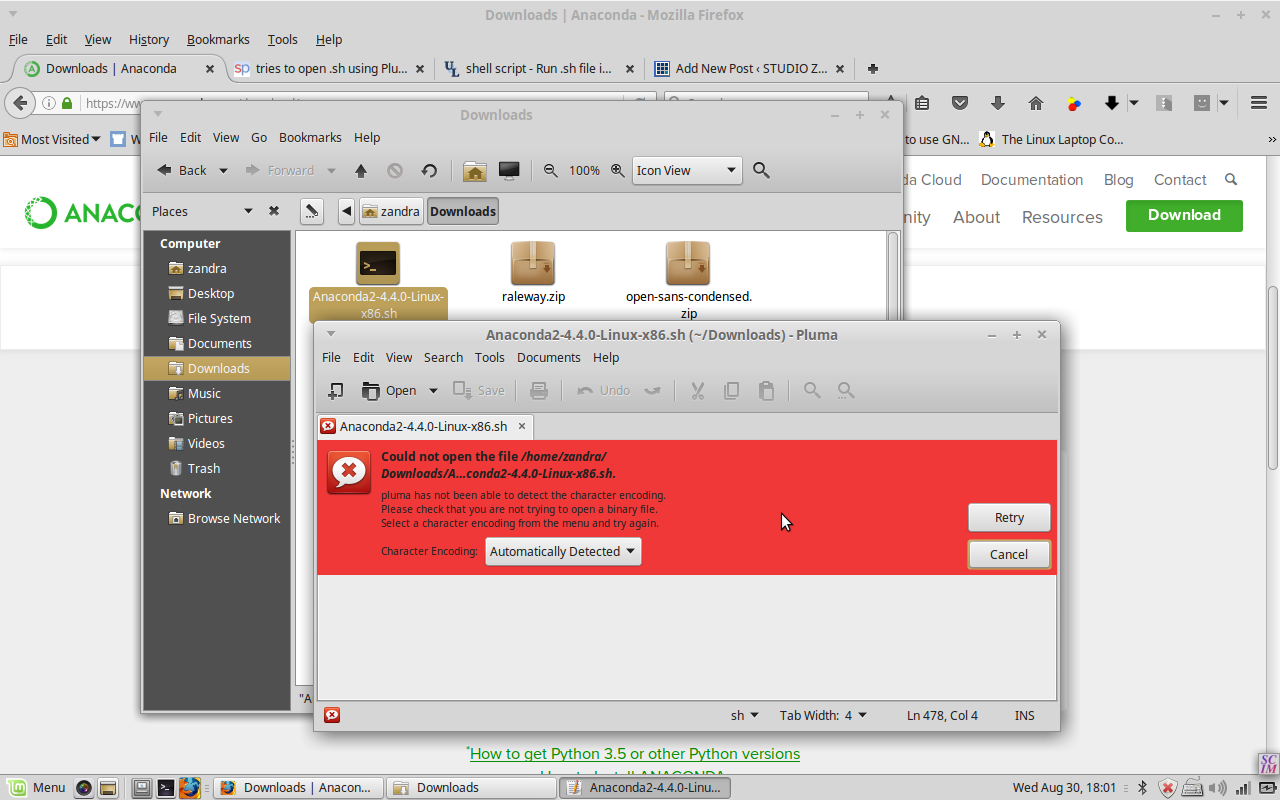
I decided, as I am wont to do, to go all in: try to complete the course on Linux instead of Windows. Getting stuck at jump, (“Course materials installation guide,”) prompted this blog post! The course uses Jupyter notebooks, and they recommend that newbies use something called Anaconda to install both Python and Jupyter. So I had to visit Jupyter.org on my laptop. After downloading the file Anaconda2-4.4.0-Linux-x86.sh , I of course tried to double-click it, and got this:

screenshot .sh file

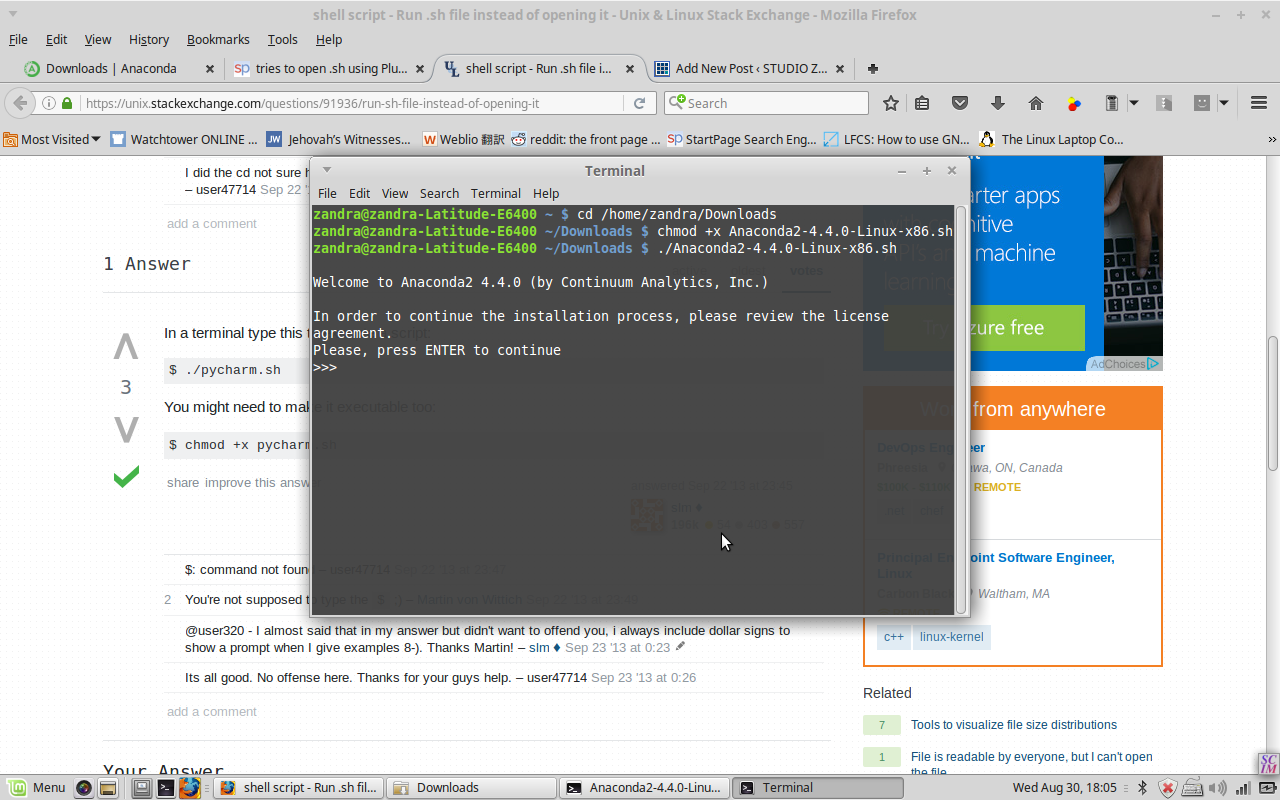
The text editor is tryna open it! So a web search brought me to StackExchange, where I learned that you have to manually run the .sh file from inside the correct directory in Terminal. Success!

screenshot terminal

So I entered ‘jupyter notebook’ into a new terminal window, it was very anticlimactic to just see a new browser tab opened with …a list of my local folders. But glad it’s finally done!!

It’s pretty easy to write commands in Python and then immediately run them by pressing Shift-Enter. And saving is easy as well. On to the next course module, I hope it doesn’t take as long as the installation took!