Bubble.is — I Made a Thing

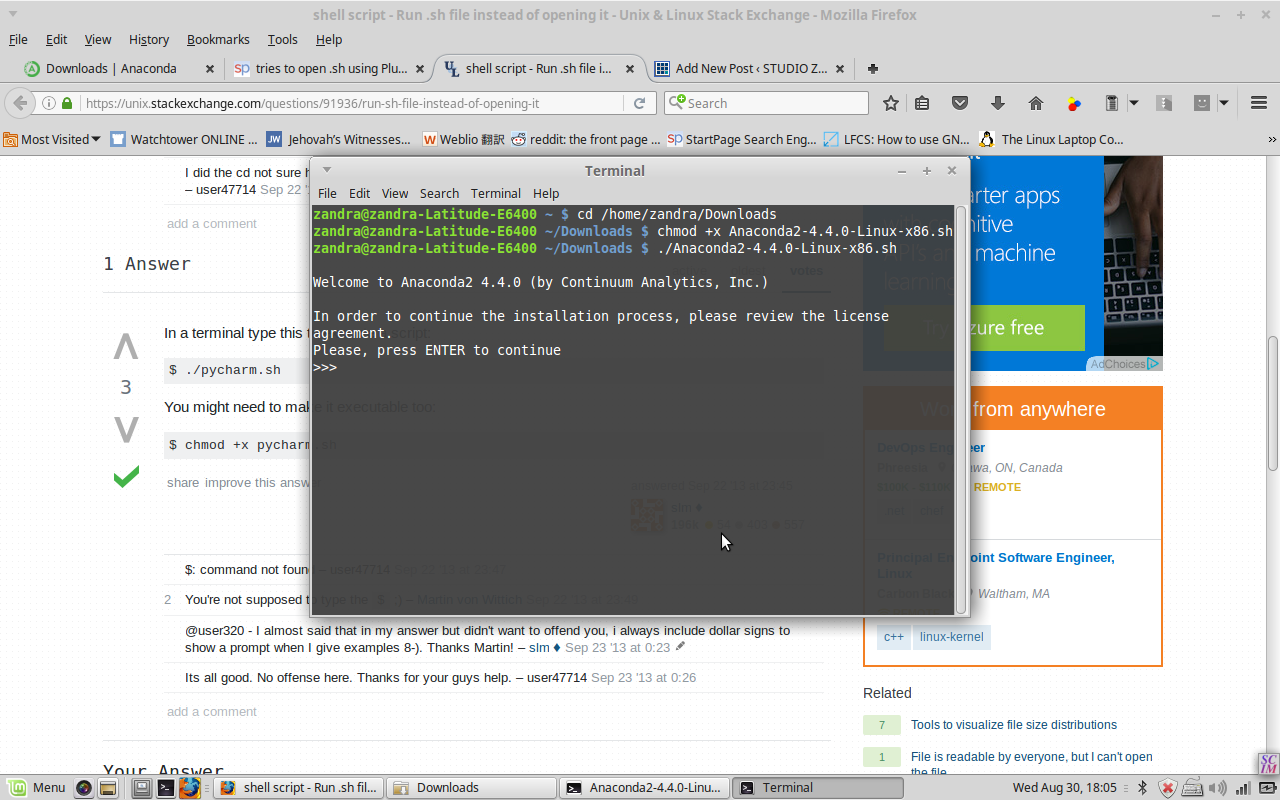
Bubble.is helps people with limited coding skill to produce apps. I had played around with it a few months back but the other day I spent the entire day (I know, I know,) figuring out how to build a little web app which calculates one’s age in what I call JahTime. It’s kind of like how 1 dog-year is about 7 years to a human, instead it’s based on 1 God-day being equal to 1000 human years (according to the Bible).

Desktop browser screengrab of JahTime

So anyway, I have to buckle down and decide which language I will REALLY study thoroughly for the next few months. I was really bouncing around quite a bit between Python, JS, and Java, and therefore not going deeply into any of them! Listening to a podcast at Codenewbie.org, I was reminded that it’s important to pick a language and focus on it for a few months. 

Python, R, and C++ are top choices for machine learning, which I am interested in learning about in the future. I’ve already started on Python. (BUT…a little detour never hurt, right? Famous last words and all that — I’m going to keep playing with Android Studio with London App Brewery via Udemy.)

So here is my Python version of my Bubble JahTime app. But I don’t (yet) know how to make Python interact with HTML in order to build my own web app from scratch…

# This program says hello, asks for user name, age, and returns age in JahTime
while True:
    print(‘Hello.’)
    print(‘What is your name?’)
    myName = input()
    print(‘Nice to meet you, ‘ + myName)
    print(‘How old are you?’)
    myAge = input()
    rounded_myAgeHrs = round(int(myAge) / 0.69)
    rounded_myAgeMin = round(int(rounded_myAgeHrs) % 60)
    myAgeJahHrs = int(rounded_myAgeHrs) / 60
    print(‘You are only ‘ + str(int(myAgeJahHrs)) + ‘ hours and ‘ + str(int(rounded_myAgeMin)) + ” minutes old in Jehovah’s eyes.”)
    cont = input(“Go again? y/n > “)
    while cont.lower() not in (“y”,”n”):
        cont = input(“Go again? y/n > “)
    if cont == “n”:
        break
ーーーーーーーーー
Bubble.is (バブル ・ドット・アイエス) というのは プログラミングあんまり知らなくても 、 アプリを作る助け なってる道具です 。
 数ヶ月前 バブル に登録したん だけど 先週 まる一日 遊んで 「ヤハ タイム」というアプリを作った 。 犬の人生の中 1年間 イコールズ リンゲンの 7年間 と同じ ように(聖書によると) 民にとって1日間 のは 人間 の時間 の 数え方で 1,000年間 となっている 。 自分は ヤハ タイムで何歳 だを 割り出すアプリだ 。
 これから どれの プログラミング言語を しっかり勉強 するのか を 決めなきゃいけないかなってと 思った 。Pythonか JavaScriptか Javaか のあいまいで、どれでも良く学んでいない。「コードニュビー」(コード初心者)と言うポッドキャストのアドバイスは一つ選んで数ヶ月間しかっり勉強しないっと。将来機械学習(きかいがくしゅう)を学ぶ興味あるので、Python、R、C++ はいいと思って、Pythonはもう勉強し始めたのでやっぱりPyだと思う。
今IDLE/SoloLearnでやっているけど、HTML + Pythonを使ってウェブアップの作り方まだわからない。。。

# This program says hello, asks for user name, age, and returns age in JahTime

while True:
    print(‘Hello.’)
    print(‘What is your name?’)
    myName = input()
    print(‘Nice to meet you, ‘ + myName)
    print(‘How old are you?’)
    myAge = input()

    rounded_myAgeHrs = round(int(myAge) / 0.69)
    rounded_myAgeMin = round(int(rounded_myAgeHrs) % 60)
    myAgeJahHrs = int(rounded_myAgeHrs) / 60
    print(‘You are only ‘ + str(int(myAgeJahHrs)) + ‘ hours and ‘ + str(int(rounded_myAgeMin)) + ” minutes old in Jehovah’s eyes.”)
    cont = input(“Go again? y/n > “)
    while cont.lower() not in (“y”,”n”):
        cont = input(“Go again? y/n > “)

    if cont == “n”:
        break
Android Studio practice

Challenging if you’ve never used Java before, but still very illuminating for beginners who can keep up. Basically mimic what Bill Butterfield does in every step of his video, Android Studio for Beginners Part 2.

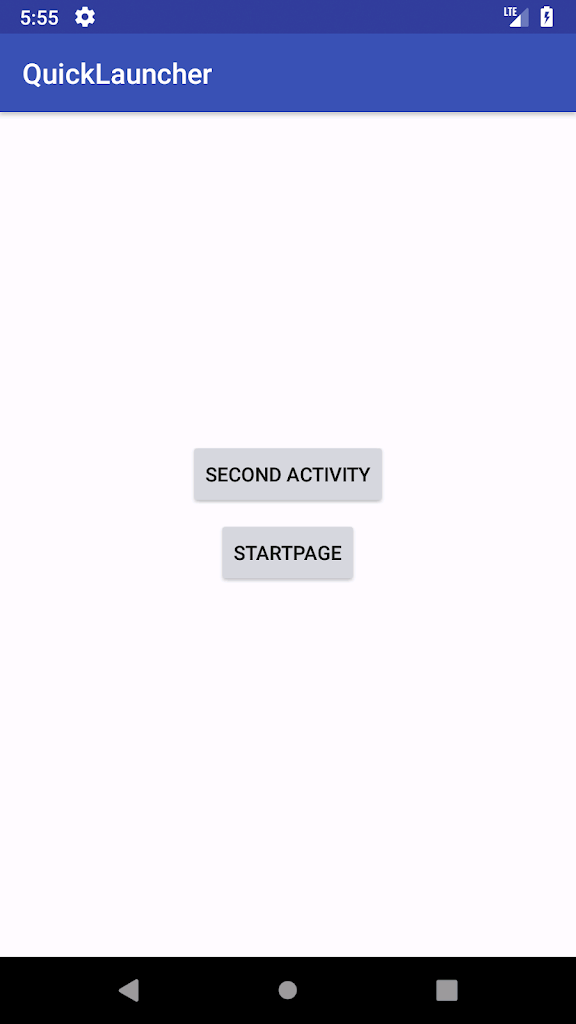
Just by pressing pause and rewind very often, I was able to follow the video and learn a bit more Java. Below are the screen caps from my version. I went with StartPage instead of Google, but other than that they are almost identical.

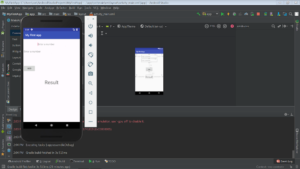
screenshot of virtual phone simple app with 2 buttons, Android Studio

creating a second activity and a link which spawns a mobile browser
screenshot of virtual phone showing Startpage.com in a browser, Android Studio
Browser opens after clicking Startpage button
     My version of AS (3.1.1) seems a bit newer than the one in the video, which can be confusing sometimes because the screens don’t look the same. 
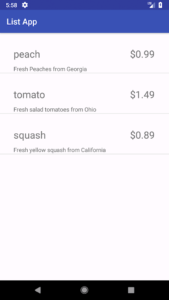
In Part 3, Bill walks us through ListView and placing images. 
screenshot of virtual phone showing list of grocery items, prices, Android Studio      screenshot of virtual phone showing tomato image, Android Studio
Check out more of Bill Butterfield’s videos here, if you dare.

Android Studio


先週AndroidStudio(アンドロイドスタジオ)3.1.1をダウンロードした。これはアップメーカーのようのソフトをやって見る二回目となった。前はAndromoと言うので少し遊んでいた。Android Studio for
Beginners part 1, (Bill Butterfieldさん)のビデオを見ながらやって見た。インストールのはあんまり問題なかったけど、Eclipseと言うプラグイン見たいないらないものをダウンロードして寄付もしてしまった。笑
ビデオをよくストップして、ドラッグ・ドロップで小さなアップリを作った。

Androidのエミュレータ(AVD=Android Virtual Device、バーチャル携帯電話)をスタートからエラーがいっぱい出たので大変だったけど、すでにJavaの段階に進歩ーすることができた。つづく。。。

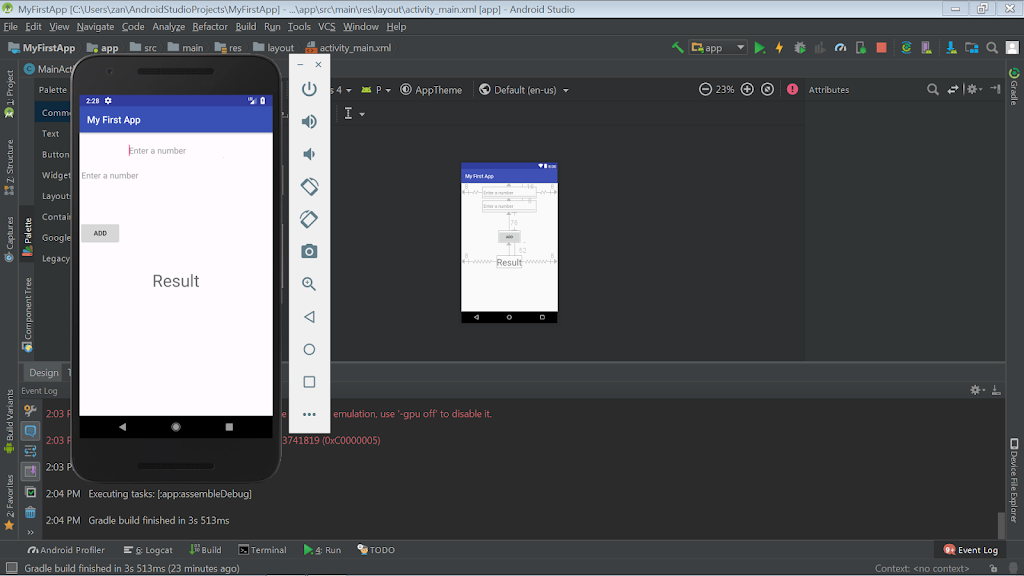
screenshot of my desktop Android Studio on Win7

Last week I downloaded Android Studio version 3.1.1. Playing
around with an app builder for the second time ever (I’ve tried a couple of online
app builders such as Andromo) I looked at a video called Android Studio for
Beginners part 1, by Bill Butterfield, on YouTube. Was able to install it with few
issues (except for making a donation to eclipse which turned out to be unnecessary, argh),
then with much pausing of the video, drag/drop the elements of the practice
app. Trying to run the app using an Android virtual device (AVD) was the longest
part so far, it generated so many errors. I’m only halfway through the video!!  Finally after getting the
emulator to work, I’m now working on the part of the video where Bill writes the —
wait for it — actual Java code. To be continued… 

ラムダ スクールの 無料の ミニブーツキャンプ! パート2(Lambda School minibootcamp, Part 2)

ラムダ スクール1週間ちゃんとできて いっぱい勉強になった 。ハワイは本土,つまりカリフォルニアと違ってサマータイムは やってないので、ワークスケジュール は事業とちょっとずれていたので 最後の2週間分あんまり参加しなかったけどよかったです 。ラムダ スクール の授業を味わうすること の最高の方法だと思う。 ラムダの bootcampは 強烈らしなので、自分でコーディング をもっと練習してから 受けるべきで あると思うようになった。 実際にbootcampのために借金したくない思うようになってる。 こんなコースを完成しなくても がっかりしない。 確かに心のどこかので素晴らしいアプリ作ってお金儲けたい気持ちはあるだけど、ちょっと落ち着いて趣味のような見方にする。 バイキングのように、あっちこっちで味わいして楽しもう。 bootcamp受けるかどうか 決めてリスト によって、ラムダの利mini bootcampは本当にいい仕方と思う。宿題は優しくて、細かく作られていて、そして自動的なtesting もあって, GitHubで アップロードする 方法の 勉強もできる。そしてslackチャンネルで 質問を 聞くこともできる事業の ビデオこの下をどうぞ。

Made it through a week of Lambda School, and I learned a ton. It really was fun, even though I couldn’t complete the last two weeks due to Daylight Savings Time in California versus my work schedule on Hawaii Standard Time. It really was an excellent way to get a taste of Lambda School’s boot camp, which seems pretty intense. I think I would have to practice a lot more coding on my own before attempting a boot camp. And actually I am less likely to attempt a boot camp now, mainly because of the expense and debt. I’m definitely no longer going to beat myself up about not completing these different free courses. Admittedly a part of me in the back of my mind is saying, “find a way to make money, try to design a super app!” I’ve decided to calm down, that this is a hobby for now; like nibbling here and there at a buffet just as I please. Lambda’s free mini boot camp is a really awesome resource if you’re trying to decide whether or not to try a bootcamp. The homework assignments are very lovingly crafted, complete with automated testing, and you can learn how to upload via GitHub. They have a Slack channel for asking questions and posting notices. You can try out their YouTube videos below. (Links open in new window)
Lesson 1 Git and GitHubStreamed live on Mar 5, 2018
Lesson 2 – HTML and CSS – March ’18 Lambda School Mini Bootcamp
Lesson 3 – Intermediate CSS – March ’18 Lambda School Mini Bootcamp
Lesson 4 – Introduction to Javascript – March ’18 Lambda School MiniBootcamp 
Web Development Mini-Bootcamp Lesson 5
Web Development Mini-Bootcamp Lesson 6
Web Development Mini-Bootcamp Lesson 7
Web Development Mini-Bootcamp Lesson 8
Web Development Mini-Bootcamp Lesson 9
Web Development Mini-Bootcamp Lesson 10
Web Development Mini-Bootcamp Lesson 11
Web Development Mini-Bootcamp Lesson 12

ラムダ スクールの 無料の ミニブーツキャンプ!(Lambda School minibootcamp)

今日の勉強は, ラムダ スクール の 無料の 3週間ミニブーツキャンプ のLesson1 だった 。 (λ =ギリシャ語の字、ラムダと言う発音だ。)
全部 英語だったので, 楽だった .  
とりあえず みんなは 持っていなければ 新しい GitHub のアカウントを 作って Git for Windows をダウンロードしたことです . (マック、リナックス:https://git-scm.com/download) 
 面白いポイントは Gitが ライナス °  トーバルズさん がクリエイトした もんだ 。 (日本語字幕 TEDの インタビュー )
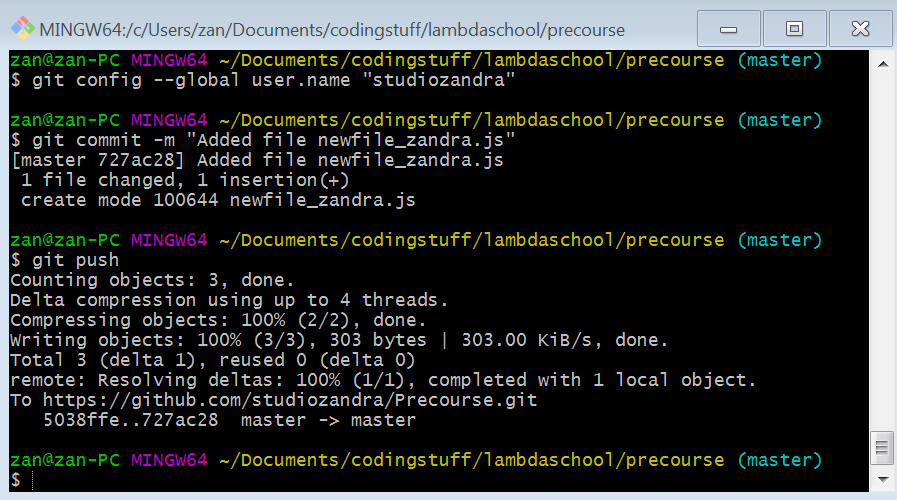
 次はGitHubで 「フォーク」を する作業学びました 。 フォークというアイコンを クリックして 、Git クローン  のリンクを 「Git bash」 のターミナル の中でコピペ とが できた 。

今日学んだコマンド:
  • cd foldername
  • mkdir newfoldername
  • touch newfilename
  • rm filename
  • git clone
  • git status
  • git add filename
  • git commit -m (commit with inline message. this save the changes in the history of this repo.)
  • git push
  • clear
  • exit (logout)
 このYouTubeのビデオで Gitについて いっぱい学んだことができた。ちょっと長かったけど 。
TKizawaさん)
明日はHMTLとCSS,楽しみにしている。。。
Lambda School free minibootcamp! 3-week class https://lambdaschool.com/
All in English.

First, everyone who hadn’t already done so created a new GitHub account. Then we downloaded Git from gitforwindows.org / https://git-scm.com

interestingly, Git was created by Linus Torvalds (which I had heard during his 2016 TED interview (JP subtitles available): https://www.ted.com/talks/linus_torvalds_the_mind_behind_linux )

Learning how to “fork” came next. By clicking fork icon, then get clone, and copying the clone URL to clipboard.
Next in GitBash, cd into the place where you want the newly cloned repository to be placed. At the prompt, we type “git clone” and paste the link, then Enter.

Inside the folder containing the repo, use the ‘git status’ command, which compares the original to your new fork. Git is constantly watching this folder for any changes.

The commands we learned today:
cd foldername
mkdir newfoldername
touch newfilename
rm filename
git clone
git status
git add filename
git commit -m (commit with inline message. This saves the changes in the history of this repo.)
git push
clear
exit (logout)

Looking forward to tomorrow — HTML and CSS!
じゃあ、 Udemy.comでのパイソン•ブットキャンップ  の コース で頑張る と言ってしまった でしょね!
不可侵大変退屈な コース で とりあえず止めて もっと楽しいコース 探そう とした。脱落者(だつらくしゃ)になってしまうっと思ってたけど、実際にいろいろな勉強仕方があって、自力(じりきself-made)で行くよい点の一つだと分かるようになった。

YouTube で見つかったもっと楽しい 先生は シルベスター• モーガン (英語)という方です。彼は我流(がりゅうself-taught)デベロッパーで、色んな実際的なビデオがあるので、それでしばらくやって行くと思う。

Ok, so I did say I was gonna go all out and do the Udemy Python Bootcamp course. BUT…it turned out to be extremely dry and boring!  I felt as if I was being a quitter by abandoning the Udemy course. But now I’m actually enjoying my learning experience, because I realized that I don’t have to be tied to a single learning structure — that’s the joy of being self-taught!

So I found a much more fun teacher on YouTube: Sylvester Morgan.  He is a self-taught developer and he has all kinds of videos, not just function after function with no real-world usage.
So I’m going to try his videos out for a while and see how they work for me.

Here’s where I started in his Python series (I skipped a few). It’s quick and easy! https://www.youtube.com/watch?v=zMnoHsgNvNQ

I also discovered that watching “A Day in the Life of a Programmer” -type videos is also helpful and motivating. They often lead to other learning resources and can be a fun study break as well.

Google音声入力(voice input) で句読文字(punctuation marks)ができないけど。。。

This time I’m posting in English because I think this will only be useful for Japanese-as-a-second-language folks. So I often use the Google app for drafting texts/email by voice in Japanese. This is because I’m much better at speaking than writing in Japanese. But Google doesn’t have any speech punctuation like it does in English. For example, if Ⅰ’m dictating a text message in English and I’m ending an interrogative sentence I say, “question mark” and the correct punctuation appears. But in Japanese, if I say “hatena” into the microphone, Google prints the word, 「はてな」which is really annoying. So I usually dictate the entire message and then go back and hunt through it to add the missing brackets, commas, periods, and question marks.
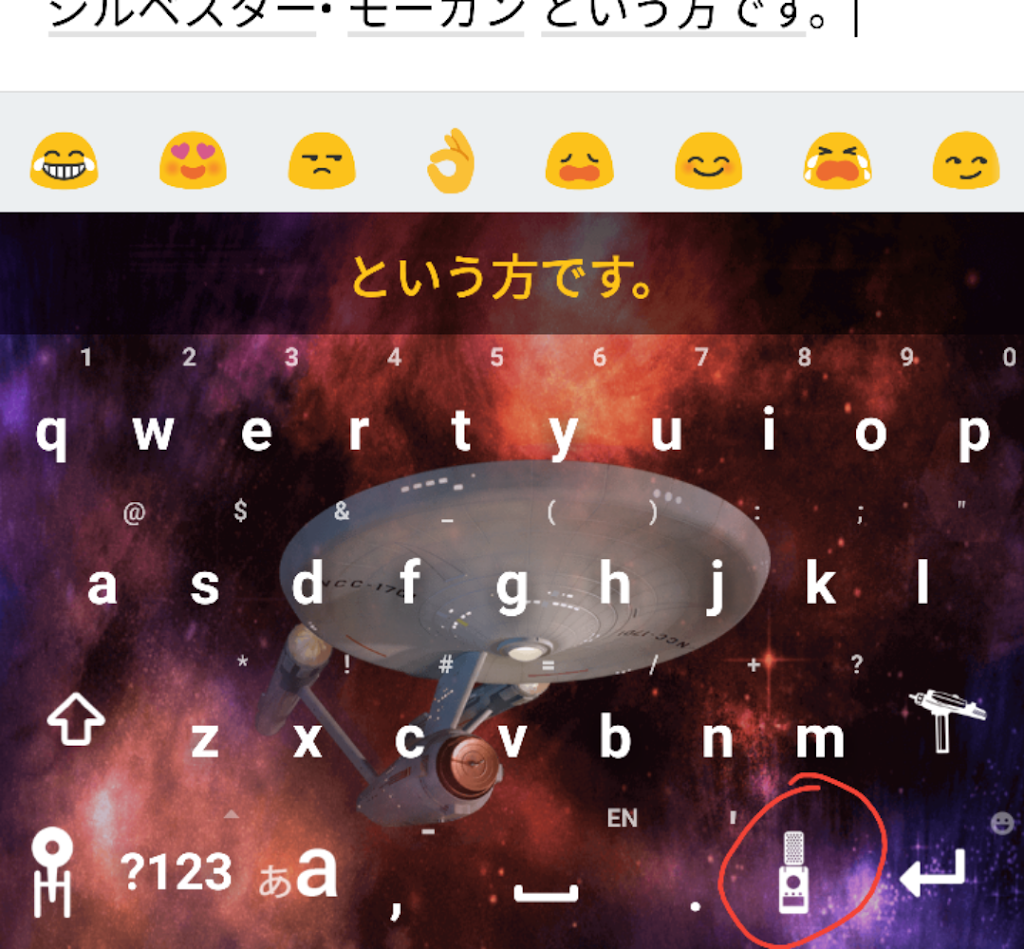
I found this lovely blog post (http://nakamahalog.com) which explains how to use the Swype app as an ok workaround. 

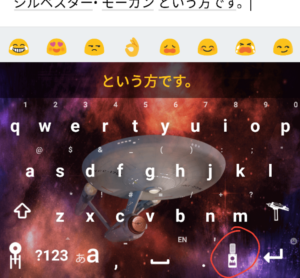
Swype keyboard with Star Trek skin. The microphone icon is a communicator.

BUT Swype wants a lot of permissions. I just switched off everything except Microphone. And I keep rotating my default keyboard in Settings, because they are basically tricky little keyloggers in my humble opinion.

The other problem was, I was saying the wrong words like “chon” for a period. nakamahalog also provides this handy chart of what to call all the punctuation marks when using Swype (and probably Google, whenever they get around to this functionality). I took the liberty of adding the yomikata below:

 [ 大かっこ開く dai kakko hiraku  ] 大かっこ閉じる dai kakko tojiru
 ‘ アポストロフィー aposutorofī  ◯ まる maru
 ▲ 黒さんかく kuro sankaku  : コロン  koron
 , コンマ  konma  – ダッシュ  dasshu
 ! 感嘆符/ビックリマーク/ kantan fu / bikkuri māku
エクスクラメーション・マーク ekusukuramēshon māku
 – ハイフン  haifun
. ピリオド/ドット piriodo / dotto  ? 疑問符/はてな gimon fu / hatena
 ” ダブルクオーテーション daburu kuōtēshon  ” ダブルクオーテーション閉じる daburu kuōtēshon tojiru
 ‘ クオーテーション kuōtēshon  ‘ クオーテーション閉じる kuōtēshon tojiru
 ; セミコロン semi koron  & アンド/アンパサンド ando / anpasando
 * アステリスク asuterisuku  @ アットマーク atto māku
 / スラッシュ surasshu  ^ キャレット kyaretto
 ・ 中黒 chū kuro  ° 度記号 do kigō
# シャープ shāpu  % パーセント pāsento
 _ アンダーバー/アンダースコア andābā / andāsukoa  | パイプ paipu
 $ ドル記号 doru kigō  ¢ セント記号 sento kigō
 £ ポンド記号 pondo kigō  € ユーロサイン yūro sain
 ¥ 円記号 en kigō  🙁 しかめっ面 shikamettsura
 🙂 スマイリー sumairī   😉 ウインク uinku
 ® 登録商標 tōroku shōhyō  > 大なり dai nari
 < 小なり  ko nari   – マイナス/引く mainasu / hiku
 x かける kakeru  + プラス/足す purasu / tasu
 ÷ わる waru  = イコール ikōru

New tech blog!

So I decided to stop with the “Tech Tangents” already. I had an old blog years ago which was basically my Japanese practice notebook typed up and posted online. Last week while dealing with a friend’s tech support issue, I decided to write up my experience. Then, since I am a glutton for punishment, I decided to also write it up in Japanese. After I did that, I thought, “hey, remember your old Japanese blog? Post ‘er there!”

studiozBlogPost

From now on, I’ll endeavor to keep my techie stuff separate from my art stuff in this way. I think that forcing myself to write in both English and Japanese will keep me from getting too deeply involved in tech blog posts because of the level of difficulty. I also used my dad’s old domain name, dhrp.net , to redirect to my Blogger page:

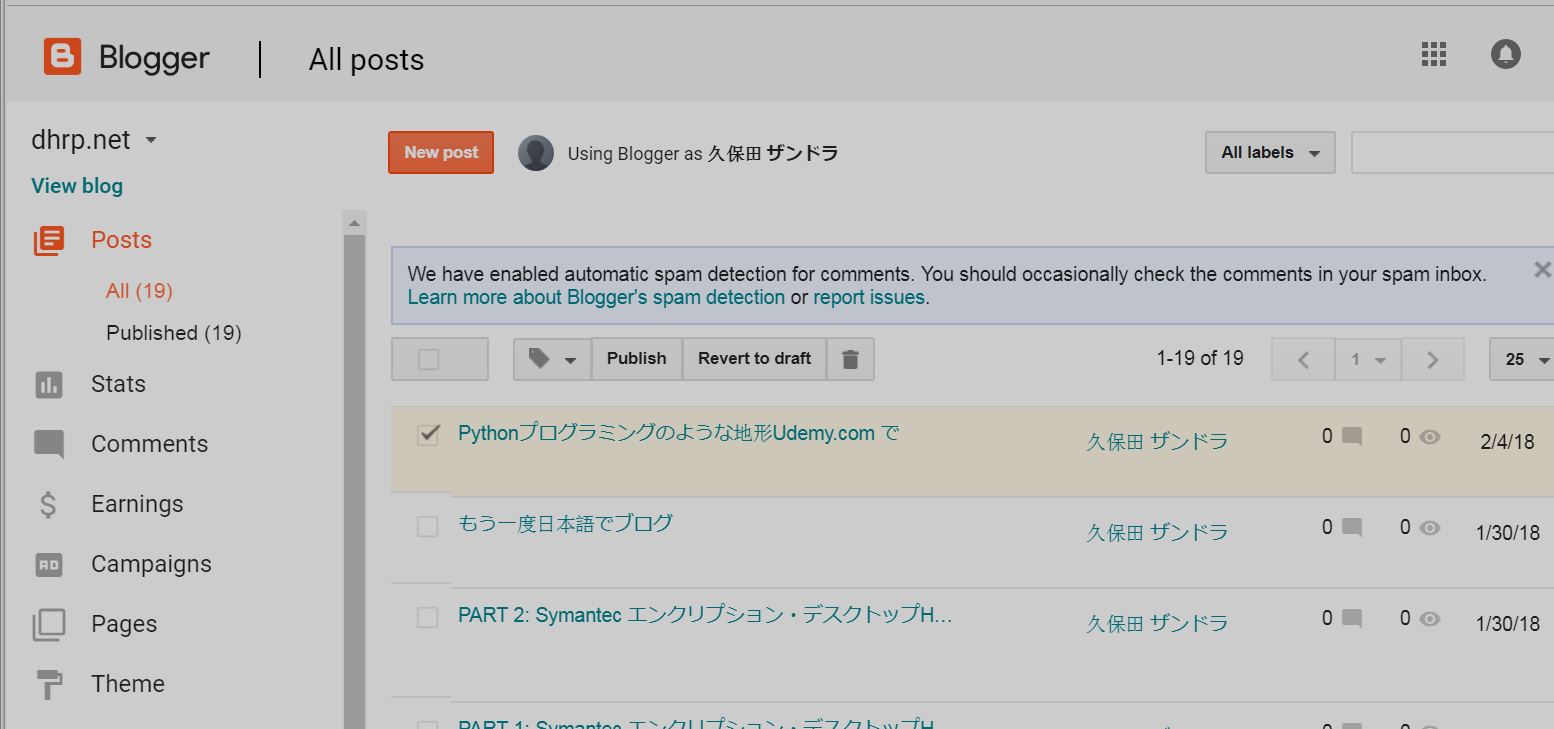
dhrp.net

Pythonプログラミングのような地形Udemy.com で

(Adapted from the original English post at https://studiozandra.com/tech-tangent-python-on-linux-here-we-go/ )
子供の時に 本 いっぱい読んで 将来に学科になるつもりだった。 高校に入ると 美術 にしたけど、 まだ掌篇小説(しょうへんしょうせつ)や詩を書いていた。 いろんな興味がいっぱいありすぎて しまった!
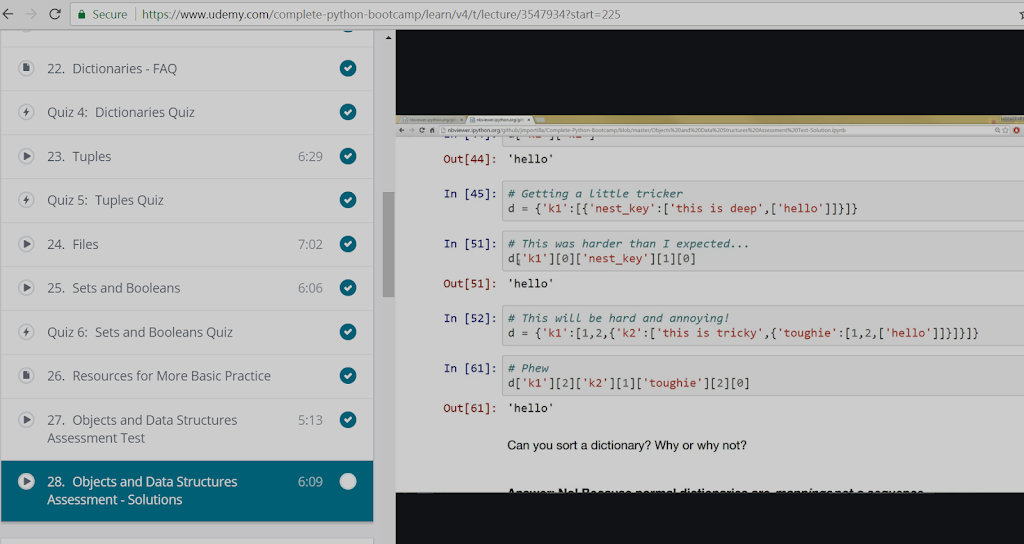
テクノロジーについてを読むのが大好き。 最近 Python というプログラミング 言語 を学ぼうとしてる。 ブートキャンプのような地形は 高すぎて できないので オンラインをコースを受けている。Udemy.com で “Complete Python Bootcamp: Go from Zero to Hero in Python” と言うコース 9.99ドル 登録 することができた。
Udemy パイソン コース

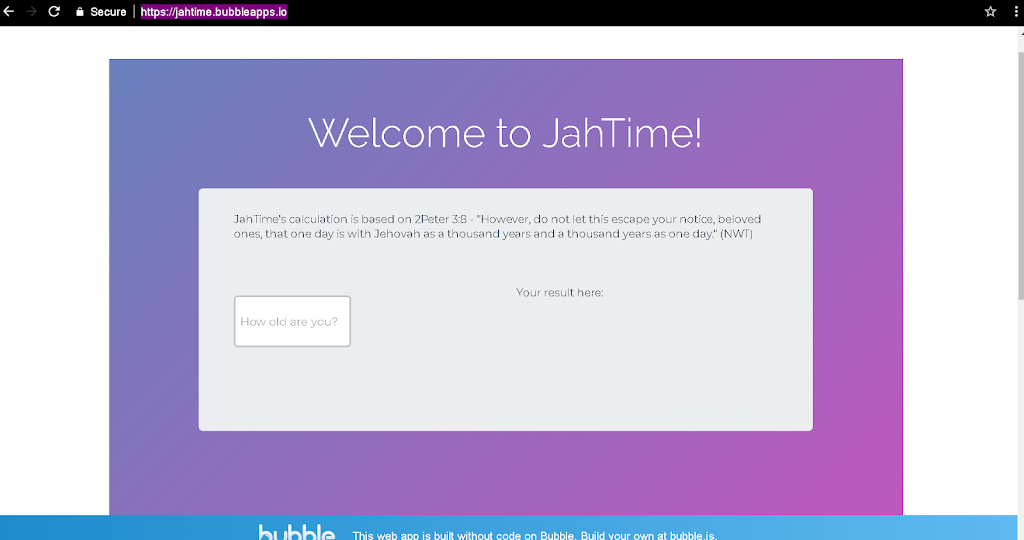
本気でやらないと思ってしまって Windows じゃなくて Linux でやろう とした。 それで一番最初の 段階で 困った。 このコースの中で ジュピター ノートブック(Jupyter Notebooks) という Web サービスを よく使うので、 インストールしないといけなかった。 アナコンダ というツール を使って、 ジュピターと Python 両方で インストールできて便利です。 そして Jupyter.org に行って ファイルをダウンロードして ダブルクリックした。 けどこういう赤い色のエラーが出てしまった。

問題は Linux ちゃんは text editor  でそのファイルを開こうとしてた。 ウェブ検索してから スタック エクスチェンジ stackexchange で正しい 仕方 を学んだ。

.sh ファイルを ターミナル(terminal)の中 そのダウンロードした ダイレクトリー に行って  chmod のコマンド をしないといけない。

それが終わってから 新しいターミナルを開いてjupyter notebook を書くと、 ブラウザタブが 自動的に 出て 自分の全部の ローカルフォルダ 見るようになった。

Python でコマンドを書いて Shift+Enter 起こしてすぐ ラン ができる。

もう一度日本語でブログ

ちょっと年取ったり違う国に住んだり 違う仕事を している状態になってるけど まだ 日本語 で遊んでいる。 今ハワイに住んでるので 日本語を使う経験 は すごい 増やした。 話すのはあまり問題ないけど帰ったり読んだりするのがまだ難しいです ので もうちょっと練習しなきゃいけない と思った。 日本語の辞典 ウェブサイトとアプリ。。。

http://ejje.weblio.jp/

http://takoboto.jp/
https://www.facebook.com/pages/Takoboto/257922567700189

。。。を 使って これから 書きます!